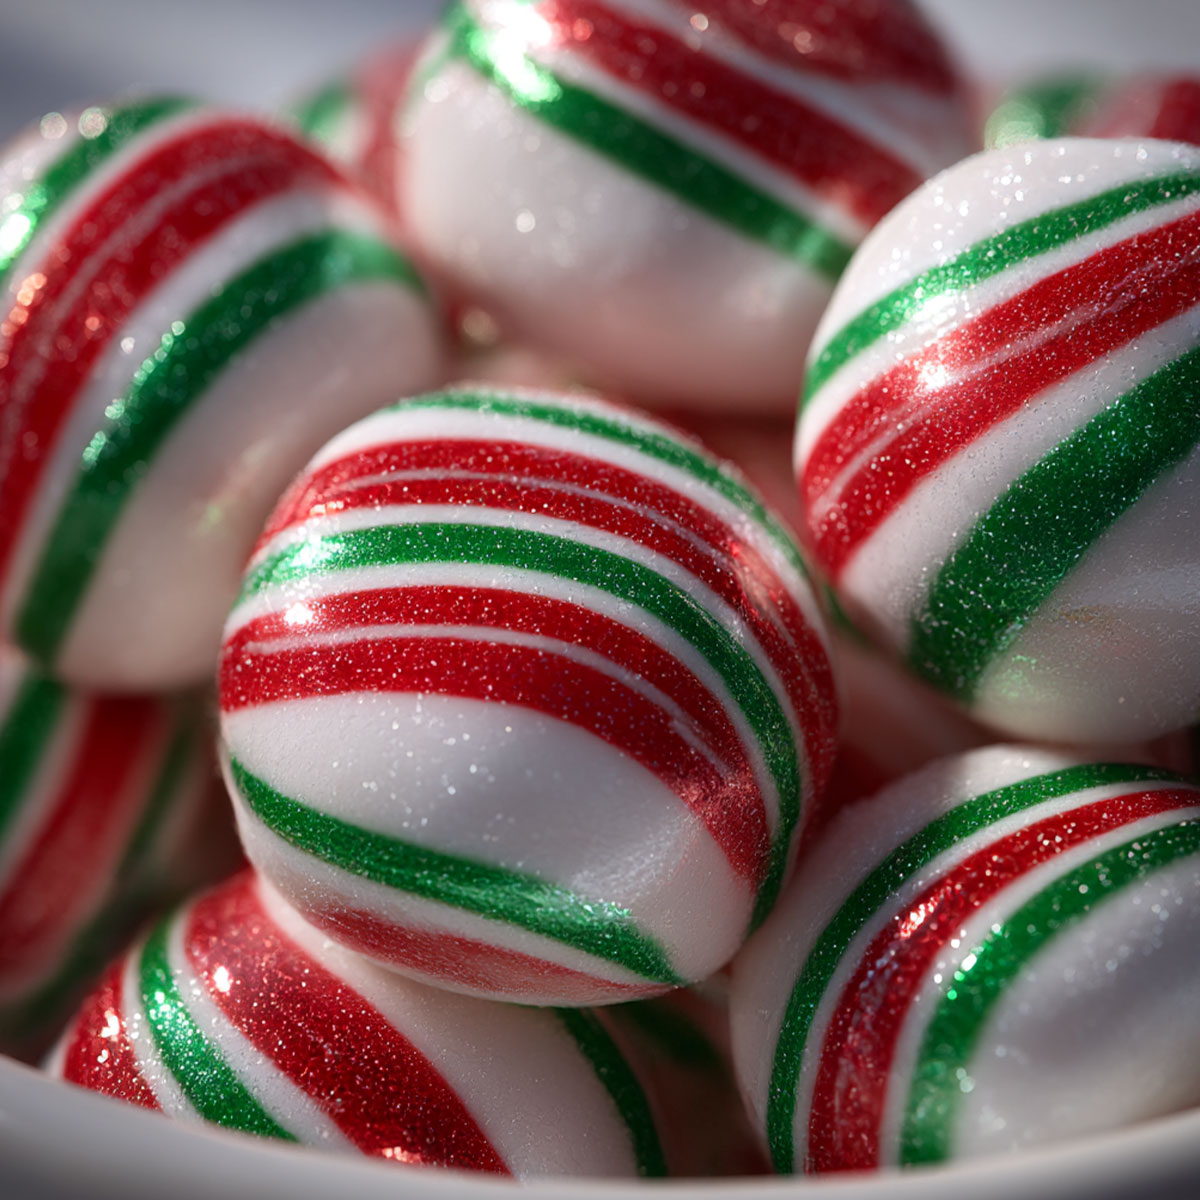
Soft Peppermint Balls are the ultimate no-bake holiday candy recipe—a creamy, minty, and festive treat that brings pure Christmas joy in every bite. The moment you mix powdered sugar with cool peppermint extract, a wave of sweet, frosty aroma fills your kitchen, wrapping you in that cozy holiday feeling. Each piece melts on your tongue, delivering a buttery-smooth texture balanced with the refreshing snap of peppermint.
This easy peppermint candy recipe is perfect for beginners and busy holiday bakers who want to make something beautiful without turning on the oven. The red, green, and white swirls sparkle under a dusting of edible glitter, creating candies that double as edible décor. Whether you’re making homemade holiday gifts, preparing a festive dessert board, or just craving nostalgic Christmas candy, these Soft Peppermint Balls are the sweet reminder that the simplest recipes often create the brightest smiles.
Make a batch today, share them with friends, and watch your kitchen become the most joyful place this season!
What Makes This So Irresistible
- No oven required — a true no-bake candy recipe that saves time and energy.
- Festive colors & sparkle — red, green, and white stripes with glittery shimmer.
- Melt-in-your-mouth texture — soft, creamy, never grainy.
- Customizable flavor — adjust peppermint strength or add vanilla for balance.
- Kid-friendly project — fun to roll, color, and decorate.
- Perfect for gifting — fits beautifully into tins, jars, or party favors.
- Long shelf life — stays fresh for up to two weeks in the fridge.
- Holiday nostalgia — reminiscent of classic peppermint patties and old-fashioned candy shops.
- Instagram-worthy presentation — vibrant, glossy, and eye-catching.
- Budget-friendly ingredients — made from staples you already have.
Ingredients for Soft Peppermint Balls
Here’s what you’ll need to make these creamy, festive Soft Peppermint Balls:
- 2 cups powdered sugar (confectioners’ sugar) — the base for a smooth, melt-in-your-mouth texture. Sift for best results to avoid lumps.
- 1 tablespoon light corn syrup — adds sweetness and helps bind the dough for that perfect chewy texture. Substitute honey or maple syrup for a natural option.
- 2 tablespoons unsalted butter, softened — gives the candy its creamy richness; use vegan butter for a dairy-free version.
- ½ teaspoon peppermint extract — creates that cool, refreshing flavor that defines classic holiday peppermint candy.
- 1 tablespoon milk (plus more if needed) — adjusts consistency; whole, almond, or oat milk all work well.
- Red gel food coloring — gives vibrant holiday color without watering down the dough.
- Green gel food coloring — adds cheerful contrast for the classic Christmas look.
- Optional: edible glitter or luster dust — for that sparkling, professional finish perfect for gifts or dessert trays.
How to Make Soft Peppermint Balls – Step by Step
Step 1 – Prepare the Peppermint Dough
In a medium mixing bowl, combine powdered sugar, corn syrup, softened butter, peppermint extract, and milk.
Use a rubber spatula to mix until a smooth, pliable dough forms.
If the mixture feels too sticky, sprinkle in more powdered sugar a tablespoon at a time.
The consistency should resemble soft cookie dough—easy to roll but not tacky.
Pro Tip #1: Sift your powdered sugar first. It prevents lumps and creates that silky candy-shop finish.
Step 2 – Divide and Color
Divide the peppermint dough evenly into three portions.
- Leave one plain white for contrast.
- Tint one red with gel coloring.
- Tint the last green.
Knead each portion gently until the color is uniform.
If using gloves, you’ll avoid tinting your fingertips—a small but helpful holiday hack.
Pro Tip #2: Use gel or paste coloring only. Liquid dye adds moisture and can make the dough sticky.
Step 3 – Roll and Layer
On a clean surface dusted with powdered sugar, roll each colored dough into ropes about ½-inch thick.
For striped candy, twist the three ropes together and gently roll again to fuse the pattern.
Slice into 1-inch pieces or pinch off bits and roll between your palms to form uniform balls.
Pro Tip #3: If you prefer classic peppermint pillow candies, flatten the rope slightly and cut diagonal pieces.
Step 4 – Add the Festive Touch
Place the finished candies on parchment paper. Lightly dust with edible glitter or luster dust for shimmer.
This simple step transforms them from homemade sweets into boutique-style confections worthy of a Christmas market.
Step 5 – Chill & Serve
Transfer the candies to a tray and refrigerate for 30 minutes to firm up.
Once set, store them in an airtight container layered with wax paper to prevent sticking.
They’ll stay perfectly soft and flavorful for up to two weeks.
Pro Tip #4: For gifting, chill overnight before packaging to help them hold their round shape.
Pro Tips & Candy-Making Secrets
- Sift your sugar first. Lumps make the dough grainy; fine sugar gives that melt-in-your-mouth feel.
- Room-temperature butter = silky texture. Cold butter leaves little white flecks.
- Use gel color only. Liquid food coloring changes dough moisture and dulls the hue.
- Add milk by drops. It’s easier to loosen than to stiffen; aim for Play-Doh consistency.
- Flavor balance matters. Start with ½ teaspoon peppermint extract and increase only if you love intense mint.
- Control stickiness. Dust hands lightly with powdered sugar instead of flour—keeps flavor pure.
- Chill between steps. Ten minutes in the fridge keeps colors crisp while twisting ropes.
- Double the batch. The candies keep beautifully for gifting week after week.
- Add shimmer smartly. Use a soft brush for even glitter coverage—professional presentation guaranteed.
- Store cool, serve cool. Heat softens butter, causing the balls to slump; refrigeration preserves shape.
Variations & Substitutions
- Color swirl option 🎨: Roll smaller ropes for tighter candy-cane patterns.
- Chocolate-mint dream: Dip half of each ball in melted dark chocolate; chill.
- Vanilla snowballs: Replace peppermint with vanilla extract for a softer flavor profile.
- Vegan delight: Use plant-based butter and almond milk.
- Low-sugar tweak: Blend powdered erythritol 50/50 with sugar; texture stays nearly identical.
- Citrus sparkle: Swap peppermint for orange or lemon extract and yellow coloring for spring holidays.
- Mocha mint: Add ½ teaspoon instant espresso powder to the white portion—sophisticated twist.
- Candy-cane crunch: Roll finished balls in crushed candy-canes for texture and visual contrast.
Pro Tip #5: When testing flavor swaps, always mix a small sample first; extracts vary in intensity.
Best Ways to Serve Soft Peppermint Balls
- On a dessert board beside cookies, fudge, and truffles for color variety.
- Gift jars & tins layered with wax paper; tie with twine or ribbon for instant holiday charm.
- Hot-chocolate toppers —drop one ball into a mug for peppermint-cream flavor.
- Stocking stuffers —wrap individually in foil for nostalgic candy-shop vibes.
- Office-party favors —pack three in mini cellophane bags with branded tags.
- Wedding or baby-shower favors —swap red/green for pastel tints.
- Edible ornaments —thread cooled candies with string to hang on edible trees.
Nutritional Information (Per Ball ≈ 15 g)
Calories: 74 | Carbohydrates: 12 g | Fat: 2 g | Protein: 0 g | Sugar: 11 g
Low in fat, moderately sweet—perfect for mindful indulgence.
Health Note: For a lighter bite, halve the serving size or replace half the sugar with powdered monk-fruit.
Storage & Make-Ahead Guide
- Refrigerate: Store in airtight containers for up to 2 weeks.
- Freeze: Layer between wax paper; freeze for 3 months. Thaw at room temperature 15 minutes before serving.
- Room temperature: Safe up to 3 days in cool weather.
- For gifting: Pack chilled balls only; warm packaging causes condensation and stickiness.
Reheating isn’t needed—these are served cold—but you can soften texture by leaving at room temp 5 minutes before serving.
Helpful Q & A – Kitchen Questions Solved
Q 1: Can I make Soft Peppermint Balls ahead of time?
Absolutely. Make up to two weeks early and keep refrigerated; flavors deepen beautifully.
Q 2: Can I freeze these candies?
Yes! Freeze up to three months in airtight containers; thaw briefly before serving.
Q 3: How do I prevent sticky hands when rolling?
Dust your palms with powdered sugar instead of flour—it keeps sweetness intact.
Q 4: Can I use peppermint oil instead of extract?
Yes, but peppermint oil is stronger; use only ⅛ teaspoon to start.
Q 5: Do I need a mixer or can I stir by hand?
Hand-mixing works perfectly; these candies require no aeration.
More Tasty Ideas to Explore
- Christmas Fudge Recipe: Easy Holiday Dessert
- No Bake Peanut Butter Cheesecake Balls
- Popcorn Cake Recipe – Easy No-Bake Dessert Idea
- Soft Christmas Cookies Recipe – Perfect Holiday Treats
Your Turn in the Kitchen – Let’s Make This Holiday Shine
Now you know how to make Soft Peppermint Balls that look professional, taste nostalgic, and require zero baking. With just a few pantry staples and a swirl of color, you can create candies that brighten dessert tables and gift baskets alike. Try the base recipe first, then experiment with chocolate drizzle or citrus zest to make it your own.
✨ What’s your favorite flavor twist for peppermint candy? Share it in the comments and inspire other home confectioners!
And if this recipe adds sparkle to your holiday season, don’t forget to bookmark or pin it so the magic returns every December.