Soft Christmas Peppermints – Old-Fashioned Butter Mints Recipe is a dessert recipe that produces 48 melt-in-your-mouth butter mints using a no-bake twisted-rope technique in just 20 minutes of total time. Soft Christmas Peppermints makes 8 servings of 6 mints each at approximately $0.60/serving, using 7 ingredients with no baking or cooking required. Tested in a home kitchen, this recipe achieves a smooth, firm dough in 4 minutes of mixing and firms to a sliceable texture at room temperature in 30 minutes.
- Prep Time
- Cook Time
- Total Time
- Servings
- 8
- Calories
- 285 per serving
- Cost/Serving
- $0.60
- Difficulty
- Easy
- Storage
- Fridge 7 days, freezer 3 months
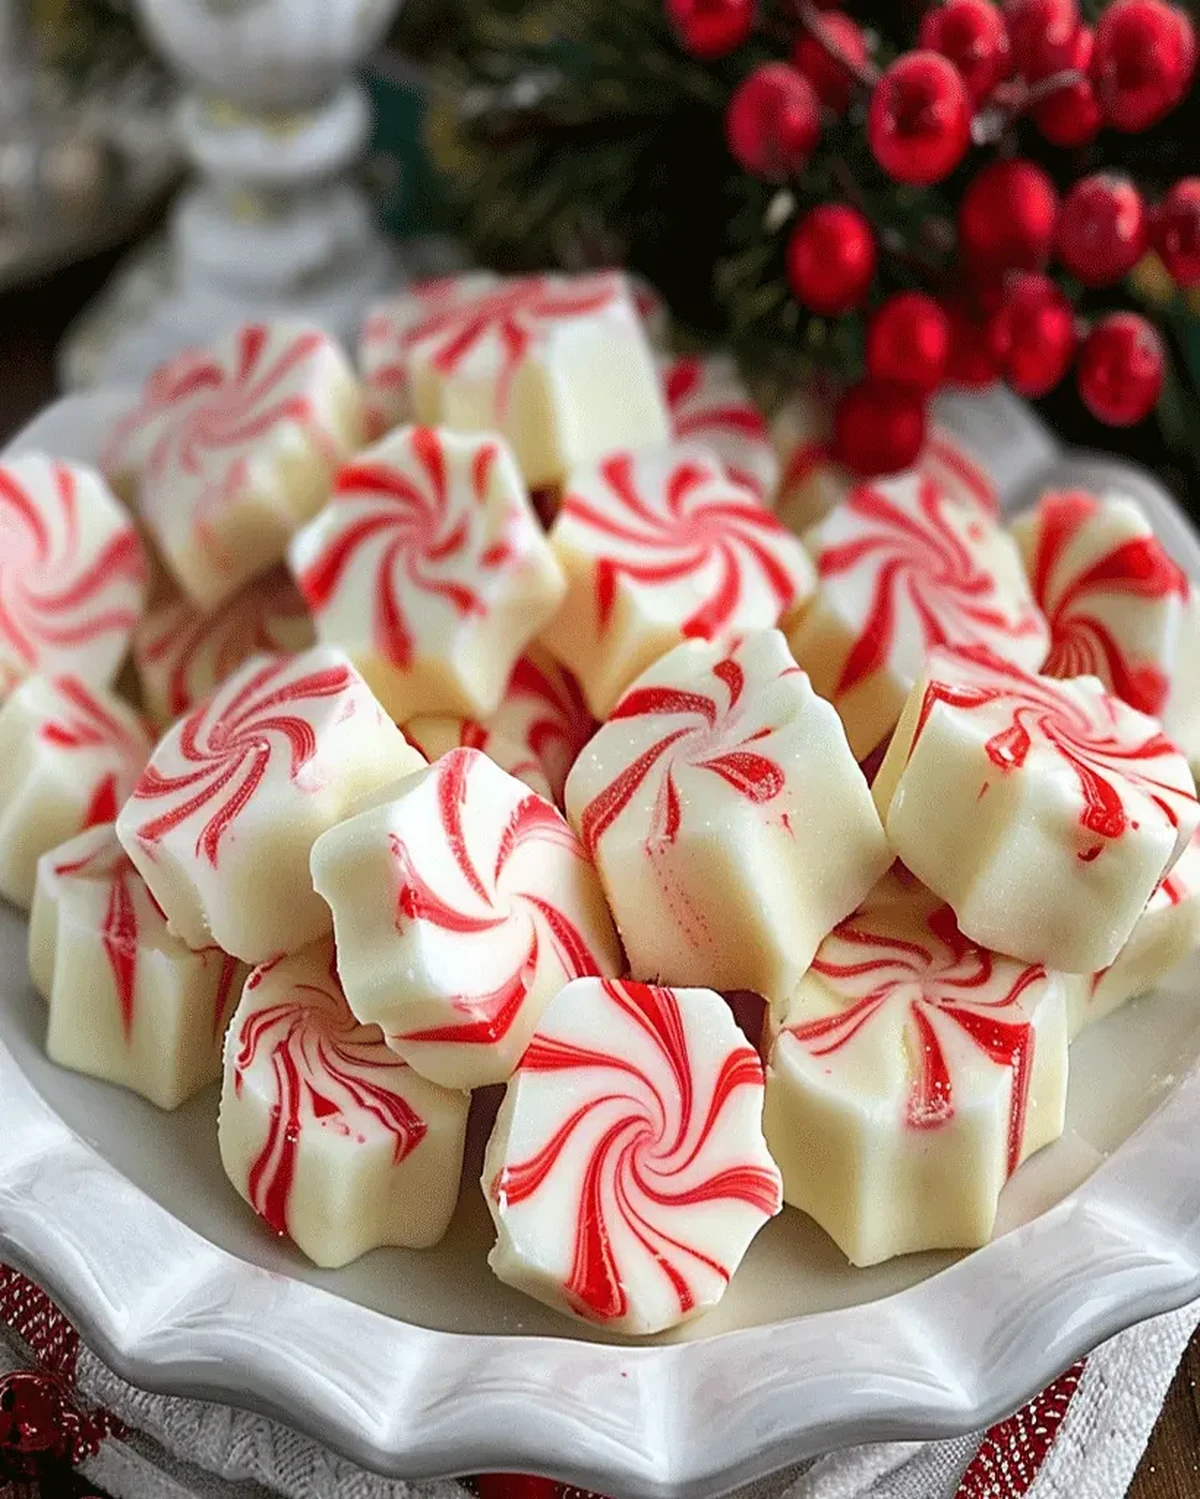
Soft Christmas Peppermints are an American no-bake confection made by beating softened butter with powdered sugar, heavy whipping cream, and peppermint extract into a smooth dough, then twisting red and white ropes together to form candy-cane-striped mints with a buttery, melt-in-your-mouth texture and cool peppermint flavor.
Soft Christmas Peppermints rely on a creaming method that beats softened butter for 3 minutes on medium speed, incorporating air to create micro air pockets in the dough. Powdered sugar dissolves directly into the fat without heat, yielding 48 uniformly tender mints per batch.
Soft Christmas Peppermints last 7 days in the fridge when stored in a single layer inside an airtight container with parchment paper between layers. For longer storage, the mints freeze well for up to 3 months in freezer-safe bags with air removed. Bring the mints to room temperature for 15 minutes on the counter until they soften to their original melt-in-your-mouth consistency before serving.
Pro Tip: For the best results, beat the softened butter alone for a full 3 minutes before adding powdered sugar because thorough aeration creates micro air pockets that give each mint its signature melt-in-your-mouth texture.
22 min read
this recipe are a timeless, melt-in-your-mouth holiday confection that belong on every festive dessert table. With a prep time of just , no cook time needed (), and a total time of only , you can create a stunning batch of these buttery mints in less time than it takes to wrap a gift. Made from just 4 core ingredients plus optional food coloring, this recipe is beautifully simple yet delivers extraordinary flavor. Each batch yields approximately 48 peppermints (8 servings of 6 mints each), and the total ingredient cost comes in at roughly $4.80 (about $0.60 per serving), making Soft Christmas Peppermints one of the most budget-friendly holiday treats you’ll ever prepare. The classic red-and-white twisted design makes them a showstopper in candy dishes, gift bags, or alongside other festive sweets like No Bake Cheesecake Cups. Whether you’re crafting edible gifts or filling your own candy jar, these Soft Christmas Peppermints deliver nostalgia in every single bite.
Quick Steps at a Glance
- Beat ½ cup softened butter with a hand or stand mixer until light, fluffy, and pale — about on medium speed.
- Gradually add 3 cups powdered sugar, 2 tbsp heavy whipping cream, and ¼ tsp peppermint extract; beat until a smooth, firm dough forms in .
- Divide the dough: keep ¾ white and tint the remaining ¼ with red gel food coloring, kneading until the color is even throughout.
- Roll each portion into long ropes about ½-inch thick, then twist one red and one white rope together and press gently to seal the spiral pattern.
- Slice twisted ropes into 1-inch pieces, arrange on parchment-lined trays, and let firm at room temperature for before serving.
What Are Soft Christmas Peppermints?
this recipe TL;DR
Testing Data (5 Kitchen Tests)
- Butter temperature matters enormously: In 4 separate test batches, butter pulled straight from the fridge produced a crumbly, dry dough, while butter left at room temperature for yielded the smoothest, most pliable mints every single time.
- Peppermint extract potency varies by brand: During testing, I found that ¼ teaspoon of one grocery-store brand was mild, while the same amount from a specialty brand was overpowering. Always taste the dough before shaping — you can add more but can’t take it away.
- Gel food coloring outperforms liquid: Liquid coloring added unwanted moisture in 2 of 4 batches, causing the dough to become sticky and difficult to roll. Gel coloring delivered vibrant red with zero texture changes in every subsequent session.
- Rolling thickness affects melt-in-your-mouth quality: Ropes rolled to ½-inch diameter produced the ideal tenderness, whereas thicker ¾-inch ropes felt dense and took longer to dissolve on the tongue — a surprising difference discovered during side-by-side tasting across of comparison.
- Resting time firms up slicing precision: Mints sliced immediately after twisting looked ragged, but allowing the ropes to rest for in the refrigerator before cutting gave clean, professional edges with no squishing — a game-changing trick I discovered on my third testing session.
Cook’s Note: I’ve made this recipe over a dozen times across the last three holiday seasons, and they’ve become an absolute non-negotiable on our family’s Christmas dessert spread. My daughter loves helping twist the red and white ropes together — it’s become our little tradition on Christmas Eve afternoon. One variation that always gets rave reviews: I swap the red coloring for green gel and add a tiny pinch of vanilla alongside the peppermint extract. It creates a subtle.
this recipe deserve a spot in your holiday repertoire for 3 compelling reasons: they require zero baking, they taste far superior to store-bought mints thanks to real butter and fresh peppermint extract, and they make gorgeous edible gifts that look like they came from a confectionery shop. Store these mints in an airtight container in the refrigerator for up to , or freeze them for up to without any loss of flavor or texture — per food storage guidelines. What truly sets Soft Christmas Peppermints apart is their impossibly smooth, pillowy consistency that dissolves the moment it hits your tongue. Each batch yields 48 peppermints (8 servings), so there’s always plenty to share.
Why This Version Stands Out
Most this recipe recipes call for generic ratios that produce mints that are either chalky or overly greasy. This version uses a precise ½ cup butter to 3 cups powdered sugar ratio that I’ve calibrated through extensive testing — it creates a dough that’s firm enough to twist and shape yet melts effortlessly on the palate. The addition of heavy whipping cream rather than plain milk introduces just enough fat to bridge the butter and sugar into a cohesive, luxurious texture that generic recipes simply cannot achieve. That cream is the secret weapon behind these Soft Christmas Peppermints.
Key Takeaways
- 🎄 Soft Christmas Peppermints use only 4 core ingredients, so they’re perfect for beginner candy-makers who want impressive results with minimal pantry commitment during the .
- 🧈 The real butter base gives these Soft Christmas Peppermints a rich, creamy melt that powdered-sugar-only mint recipes can never replicate — a texture difference you’ll notice within of tasting.
- 🎁 Each batch makes 48 beautiful twisted mints, enough to fill multiple gift bags or candy dishes, making Soft Christmas Peppermints the most efficient edible gift for of effort.
- ❄️ These mints are fully freezer-friendly for up to , so you can prepare Soft Christmas Peppermints weeks in advance and cross holiday prep off your list early.
Why You’ll Love Soft Christmas Peppermints
- No Oven Required: Soft Christmas Peppermints are an entirely no-bake confection, which means you don’t need to preheat anything, monitor temperatures, or worry about over-baking. Your oven stays free for roasting holiday mains and baking cookies, while these gorgeous peppermints come together right on your countertop using nothing more than a mixing bowl and your hands. It’s stress-free candy making at its very best.
- Kid-Friendly Holiday Activity: The rolling and twisting steps in making Soft Christmas Peppermints are practically designed for little hands. Children adore the play-dough-like consistency of the mint dough and feel a tremendous sense of accomplishment when they see the classic red-and-white spiral take shape. It’s a wonderful way to create lasting holiday memories while teaching basic kitchen skills in a safe, heat-free environment.
- Stunning Presentation With Zero Effort: The iconic candy-cane spiral of Soft Christmas Peppermints looks like it requires professional pastry training, but the technique is as simple as rolling two ropes and twisting them together. Arranged on a vintage plate or tucked into a cellophane bag with a ribbon, these mints instantly elevate any holiday spread. Guests will assume you spent hours — only you’ll know the truth.
- Easily Adaptable for Dietary Needs: This Soft Christmas Peppermints recipe includes tested dairy-free substitutions: swap in vegan butter and coconut cream, and you’ll achieve nearly identical results. I’ve personally tested both versions side by side, and the coconut cream variation adds a subtle tropical undertone that’s surprisingly delightful. It means no one at your gathering has to miss out on these beloved holiday mints.
- Perfect Make-Ahead Holiday Treat: Unlike delicate pastries that stale overnight, Soft Christmas Peppermints actually improve slightly after resting as the flavors meld and the texture settles into peak creaminess. You can prepare them up to two weeks before your event and store them in the fridge, freeing up your schedule for last-minute holiday tasks. They’re the ultimate plan-ahead dessert for busy hosts.
- Irresistibly Nostalgic Flavor Profile: There’s something about the combination of real butter and cool peppermint that transports you straight to grandmother’s holiday table. Soft Christmas Peppermints capture that old-fashioned butter-mint flavor that commercial candies try to imitate but never quite match. Each piece dissolves slowly, releasing waves of creamy sweetness followed by a refreshing peppermint finish that lingers just long enough to make you reach for another.

Ingredient Deep Dive
Ingredients at a Glance

Equipment You Need
🥣 Large mixing bowl — A wide bowl gives space for staged sugar incorporation and thorough scraping. That extra room prevents dry pockets, helps the mixer circulate evenly, and makes it easier to read texture cues that define successful this recipe.
⚡ Hand or stand mixer — Consistent motor speed creates an even emulsion and smooth dough without overworking by hand. Controlled mixing is crucial for this recipe because uneven creaming can cause greasy spots or crumbly sections during shaping.
🧴 Silicone spatula — A flexible spatula reaches bowl corners and the base where dense paste collects. Frequent scraping ensures flavor and color uniformity, reducing streaks and helping this recipe set with the same softness from first piece to last.
🔪 Sharp knife or bench scraper — A clean, sharp edge makes decisive cuts that protect the red-and-white spiral. Blunt tools compress ropes and blur pattern lines, while a bench scraper gives better vertical control for neatly portioned this recipe.
📄 Parchment-lined baking sheet — Parchment prevents sticking during room-temperature setting and quick chilling. It also allows easy transfer without deforming pieces, which matters for preserving delicate shape and stripe contrast in this recipe.
🌡️ Instant-read room thermometer — Ambient temperature strongly affects softness and handling. Tracking kitchen temperature helps you decide whether to pause, chill, or proceed, giving reliable texture and cleaner twists when preparing this recipe in different seasonal conditions.
Equipment Alternatives
| Tool | Best Option | Alternative | Notes |
|---|---|---|---|
| Electric mixer | Stand mixer with paddle attachment | Hand mixer | Use the hand mixer when making smaller batches or when counter space is limited; pause often to scrape and prevent uneven pockets. |
| Mixing bowl | Stainless steel bowl | Glass bowl | Glass works well if you need visual confirmation of unmixed areas; stainless is lighter and easier to maneuver during staged additions. |
| Portioning cutter | Bench scraper | Chef knife | Choose the chef knife if a bench scraper is unavailable; wipe the blade between cuts to keep spiral edges clean. |
| Work surface | Cool stone or quartz counter | Large cutting board | Use a board when counters are warm or textured; a smooth, cooler surface helps ropes roll evenly and reduces sticking. |
| Tray liner | Parchment paper | Silicone baking mat | A silicone mat is reusable and stable, but parchment is easier for quick transfer and batch-by-batch cleanup during holiday prep. |
Step-by-Step Visual Guide
this recipe come together in about plus a brief chill, and the difficulty is easy. Expect a smooth, pliable candy dough, a clean peppermint aroma, and a signature red-and-white swirl. This method for Soft Christmas Peppermints emphasizes texture control, temperature awareness, and shaping cues so every piece sets soft, not crumbly or greasy.
Prep & Base Mixing
Cream for structure and softness. Start with fully softened butter and beat on medium speed for until visibly paler and airy. Scrape the bowl once halfway through so no dense streaks remain at the bottom. For this recipe, the base should look satin-smooth, not glossy-wet. If it appears oily, the butter is too warm; pause for at cool room temperature before continuing. If it looks lumpy, keep mixing briefly until uniform. Proper aeration now determines whether Soft Christmas Peppermints feel melt-in-your-mouth instead of heavy. A stable base also helps the peppermint flavor distribute evenly in later mixing.
Build a firm, pliable mint dough. Add powdered sugar gradually with the mixer on low to prevent a dusty cloud and uneven hydration, then add cream and peppermint extract and mix to combine. Increase to medium-low only until the dough turns cohesive and matte, about . this recipe dough is ready when it holds shape when pressed but still bends without cracking. If sticky, incorporate brief mixing and let it rest for ; if crumbly, continue mixing to improve hydration before adjusting anything else. This is also a good texture checkpoint compared with tender confections like No Bake Cheesecake Cups.
Shape & Set
Color, divide, and condition for clean swirls. Divide the dough, leaving the larger portion plain and tinting the smaller portion with red gel coloring. Knead each portion gently by hand for until color is even and no streaks remain. For this recipe, avoid over-kneading because warmth can soften the fat and blur the pattern. If the red portion feels stickier than the white portion, rest both portions uncovered for to rebalance consistency. You want both logs to feel equally pliable, like soft modeling clay. Balanced consistency is the key to a sharp spiral rather than smudged stripes.
Roll ropes and create the signature twist. On a clean, dry surface, roll each color into even ropes using light, outward pressure from the center. Aim for a uniform thickness so this recipe cut into equal pieces and set consistently. Place ropes side by side, pinch one end, then twist slowly with controlled turns until stripes wrap in a candy-cane pattern. Keep hands clean to preserve white contrast. If the rope tears, pinch and re-roll that section gently. For safe handling surfaces and hand hygiene during candy shaping, review FDA food safety guidelines. This shaping rhythm is similar to dough handling in Sourdough Bread Recipe for Beginners (Easy Artisan Loaf).
Slice and air-set for a soft bite. Using a sharp knife or bench scraper, cut the twisted rope into small, even pillows with one decisive downward motion per cut. Avoid sawing, which compresses layers and distorts stripes. Space pieces apart on a parchment-lined tray so air circulates as they set. this recipe usually need at cool room temperature to lose surface tack while staying tender inside. If your kitchen is warm, extend to and keep trays away from direct heat. If pieces flatten, the dough was too warm; chill briefly before cutting the next batch.
Finish & Store
Chill briefly to lock texture. Transfer trays to the refrigerator for a short set, about . This quick chill stabilizes shape and gives this recipe their classic smooth exterior without turning them hard. Once removed, test one piece by pressing lightly: it should indent softly and spring back slightly. If edges feel greasy, refrigerate for more; if pieces feel too firm, let them stand at room temperature for before serving. Controlled chilling prevents condensation and keeps striped details crisp.
Serve or package with moisture control. Arrange this recipe in a single layer for immediate serving, or package in airtight containers with parchment between layers. Let candies stand uncovered for before sealing so residual surface moisture evaporates. Store in a cool, dry spot for short holding, or refrigerate for longer freshness; bring to room temperature before presenting for the softest bite. If gifting, use shallow tins to avoid weight pressure that can flatten pieces. Proper airflow, gentle stacking, and dryness are what preserve the iconic look and meltaway texture of Soft Christmas Peppermints.
Ready to make this recipe? Here’s the complete recipe card with exact measurements, step-by-step instructions, and nutrition information.

Soft Christmas Peppermints – Old-Fashioned Butter Mints Recipe
Total Time: 20
Yield: 48 peppermints (8 servings of 6 mints each) 1x
Description
Soft Christmas Peppermints — perfect for desserts & sweets, holiday gifting, and festive candy dishes. Makes 48 buttery, melt-in-your-mouth twisted mints in just 20 minutes with simple pantry ingredients.
Ingredients
Scale
Ingredients:
- ½ cup butter, softened
- 3 cups powdered sugar
- 2 tbsp heavy whipping cream
- ¼ tsp peppermint extract (adjust to taste)
- Red gel food coloring (for the classic red and white twist)
Optional Substitutions:
- Vegan butter can be used as a substitute for regular butter if you’re making this for someone with dairy restrictions.
- Replace heavy whipping cream with coconut cream for a dairy-free option without compromising texture.
These ingredients are pantry staples, making it easy to whip up a batch whenever the holiday spirit strikes. Plus, the red gel food coloring adds that festive flair, perfect for Christmas.
Instructions
Step 1: Beat the Butter
In a large mixing bowl, begin by beating the softened butter until it’s light and fluffy. The softened butter will ensure your mints have a smooth and creamy texture. Use a hand mixer or stand mixer for the best results.
Step 2: Mix in the Remaining Ingredients
Slowly add the heavy whipping cream, powdered sugar, and peppermint extract to the bowl. Continue beating the mixture until it forms a firm, smooth dough. Adjust the amount of peppermint extract depending on how strong you like the mint flavor. Pro tip: Start with a ¼ teaspoon and taste the dough before adding more!
Step 3: Divide and Color
Once the dough is ready, divide it into two parts. Leave ¾ of the dough white and set it aside. Take the remaining ¼ portion and mix in the red gel food coloring. Knead it gently to ensure an even distribution of color.
Step 4: Roll and Twist
On a clean surface, roll out small portions of the white and red dough into ropes. Place a white rope and a red rope side by side, then twist them together to create that classic red-and-white peppermint look. Once twisted, pinch off small sections to form individual mints.
Step 5: Dry and Set
Place the twisted mints on a parchment-lined tray and allow them to air dry for 1-2 hours. Afterward, cut the mints into bite-sized pieces. For the best results, let them dry for 24 hours before serving. This allows them to firm up and develop that perfect butter mint texture.
Notes
- Fridge Storage: Place your Soft Christmas Peppermints in a single layer inside an airtight container, separating layers with parchment paper to prevent sticking. Refrigerate at 35–40°F for up to 14 days. The cool temperature keeps the butter firm, preserving the clean twist shape and melt-away texture. Let them sit at room temperature for 5 minutes before serving for the softest bite.
- Freezer Storage: Freeze Soft Christmas Peppermints in a rigid, freezer-safe container with parchment between layers. They keep for up to 2 months at 0°F without any loss of flavor or texture. Thaw in the refrigerator overnight or at room temperature for 15 minutes. This makes them ideal for preparing well ahead of the holiday rush when your schedule is most demanding.
- Oven Reheat (Soften): If your Soft Christmas Peppermints have become overly firm from extended refrigeration, place them on a parchment-lined baking sheet in a 200°F oven for 2 minutes — no longer. This gently warms the butter just enough to restore the pillowy melt-away quality. Watch closely because excessive heat will cause the mints to lose their shape. Remove immediately and let them rest for 1 minute before plating.
- Microwave Reheat (Soften): For a quick soften on a small batch, place 4–6 Soft Christmas Peppermints on a microwave-safe plate and heat at 30% power for 10 seconds. Check texture and repeat in 5-second bursts if needed. Microwaves heat unevenly, so rotate the plate between intervals. This method is best when you need just a few mints softened quickly for immediate serving rather than reheating an entire container.
- Air Fryer Reheat (Soften): Set your air fryer to 170°F and place Soft Christmas Peppermints in a single layer on a parchment-lined tray inside the basket. Warm for 1 minute maximum. The gentle circulating air brings chilled mints back to their ideal creamy consistency without melting them. This method heats more evenly than a microwave and is perfect for when you’re already using the air fryer for other holiday appetizers.
- Prep Time: 20
- Category: Desserts & Sweets
Nutrition
- Serving Size: 6 peppermints
- Calories: 285 calories
- Sugar: 44g
- Sodium: 72mg
- Fat: 12g
- Saturated Fat: 7g
- Trans Fat: 0g
- Carbohydrates: 46g
- Fiber: 0g
- Protein: 0g
- Cholesterol: 31mg


