Description
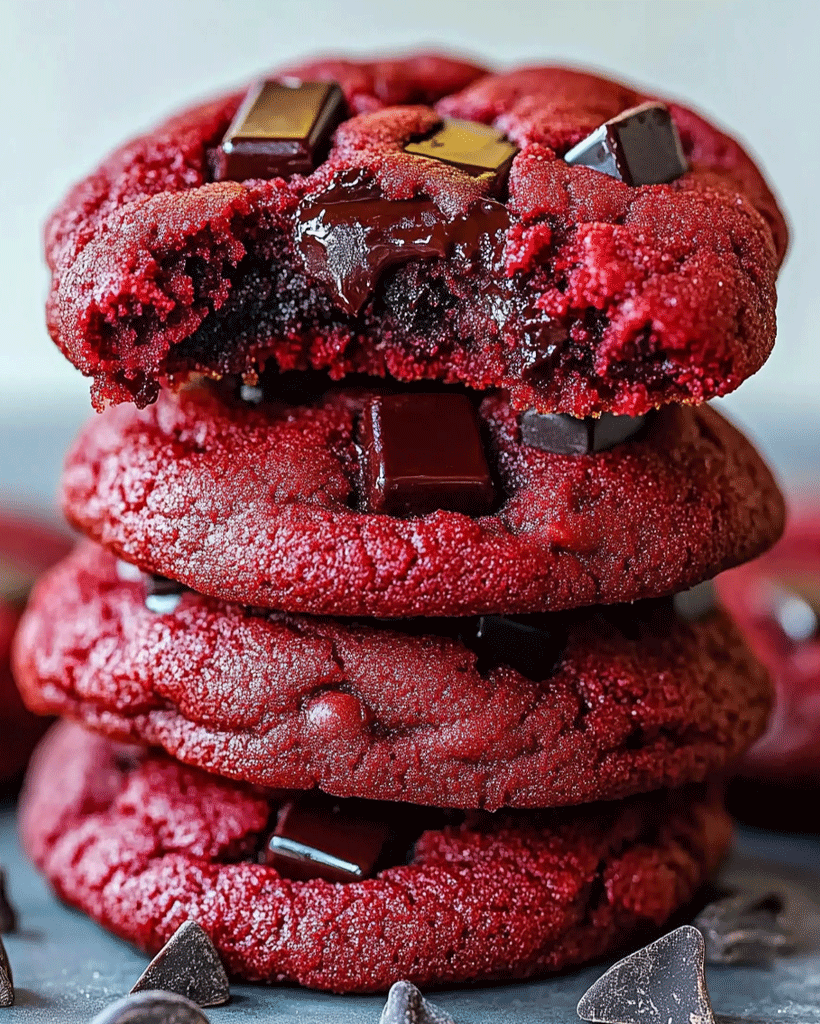
Hello, cookie lovers! Today, we’re diving into the world of Red Velvet Chocolate Chunk Cookies—a truly decadent twist on a classic dessert that’s bound to impress. If you’re a fan of that rich, chocolatey taste combined with the iconic red velvet hue, these Red Velvet Chocolate Chunk Cookies are just for you. Whether you’re baking for a festive occasion or simply craving a sweet treat, this recipe is a guaranteed hit. So, let’s roll up our sleeves and get ready to bake these delicious delights!
Ingredients
- 1 1/2 cups all-purpose flour – helps create the structure of the cookie
- 1/4 cup unsweetened cocoa powder – provides the chocolatey red velvet flavor
- 1 tsp baking soda – for a slightly puffy, soft texture
- 1/4 tsp salt – enhances the flavor balance
- 1/2 cup unsalted butter, softened – for a rich, buttery base
- 3/4 cup granulated sugar – for sweetness
- 1/4 cup brown sugar – adds moisture and a hint of caramel flavor
- 1 large egg – binds ingredients and adds moisture
- 1 tbsp milk – keeps the dough soft and helps with texture
- 1 tbsp red food coloring – for that classic red velvet look
- 1 1/2 tsp vanilla extract – for added flavor depth
- 1 cup chocolate chunks or chips (plus extra for topping) – for gooey, chocolatey goodness
Optional Substitutions:
- Gluten-Free Flour: Substitute with a 1:1 gluten-free baking flour to make these cookies gluten-free.
- Vegan Option: Use vegan butter, a flax egg (1 tbsp flaxseed meal + 3 tbsp water), and plant-based milk.
Instructions
Step 1: Preheat the Oven
Preheat your oven to 350°F (175°C) and line a baking sheet with parchment paper. This ensures the cookies bake evenly and won’t stick to the pan.
Step 2: Prepare the Dry Ingredients
In a medium bowl, whisk together flour, unsweetened cocoa powder, baking soda, and salt. Set this aside; it will be mixed into the wet ingredients later.
Step 3: Cream the Butter and Sugars
In a large bowl, beat 1/2 cup softened butter, 3/4 cup granulated sugar, and 1/4 cup brown sugar until light and fluffy (about 2 minutes). This step is crucial for a soft and chewy cookie texture.
Step 4: Add the Wet Ingredients
Add 1 large egg, 1 tbsp milk, 1 tbsp red food coloring, and 1 1/2 tsp vanilla extract to the butter mixture. Mix until fully combined, creating the base for that signature red velvet flavor.
Step 5: Combine the Dry and Wet Mixtures
Gradually add the dry ingredients to the wet ingredients, mixing until just combined. Avoid overmixing to keep the cookies tender.
Step 6: Fold in the Chocolate Chunks
Gently fold in 1 cup chocolate chunks. This is what makes each bite a chocolatey delight. Reserve a few extra chocolate chunks to press on top of the dough for a bakery-style look.
Step 7: Shape and Bake the Cookies
Scoop about 1 1/2 tablespoons of dough for each cookie and place them on the prepared baking sheet, spacing them about 2 inches apart. Gently press a few additional chocolate chunks on top of each cookie dough ball for added visual appeal.
Step 8: Bake and Cool
Bake for 10-12 minutes, or until the edges are set but the centers remain soft. Let the cookies cool on the baking sheet for about 5 minutes, then transfer them to a wire rack to cool completely.
Notes
- Use Room Temperature Ingredients: Room-temperature butter and egg help create a smooth, well-blended dough.
- Chill the Dough (Optional): For a thicker cookie, chill the dough for about 30 minutes before baking. This step is optional but recommended if you prefer a thicker texture.
- Measuring Flour: Be careful not to pack the flour, as this can lead to a dense texture. Lightly spoon flour into the measuring cup and level it with a knife.