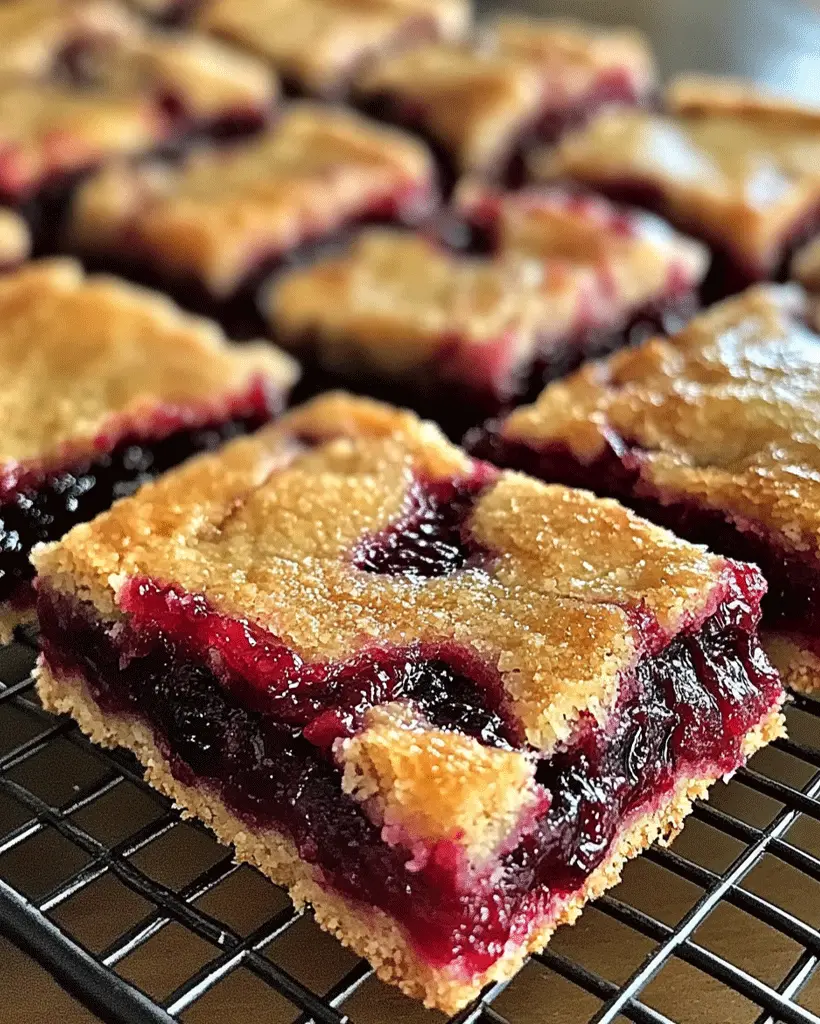
Welcome to another delightful recipe that’s sure to satisfy your sweet tooth! Today, we’re diving into the world of Cherry Pie Bars, a delicious and easy-to-make dessert that’s perfect for any occasion. Whether you’re hosting a potluck, preparing a family gathering, or just craving something sweet, these Cherry Pie Bars will hit the spot. They combine the comforting flavors of cherry pie with the simplicity of a bar recipe, making them an ideal treat for fans of fruity desserts.
Introduction: What Makes Cherry Pie Bars Special?
Cherry Pie Bars are a fun twist on the classic cherry pie, offering the same sweet and tart flavors in a more portable, easy-to-serve form. These bars have been beloved in American households for years, often making appearances at summer picnics, holidays, and bake sales. They bring together a buttery, soft crust with a luscious cherry pie filling and are topped with a sweet almond glaze that enhances the fruity flavor.
What makes this dish so special? It’s the perfect balance of flavors—rich buttery dough, sweet cherries, and a hint of almond. Plus, it’s a versatile recipe that can be customized to suit any occasion. Let’s get started on how to make these delicious Cherry Pie Bars!
Ingredients for Cherry Pie Bars
To make these irresistible Cherry Pie Bars, you’ll need the following ingredients:
- 1 cup butter, softened
- 2 cups sugar
- 4 eggs
- 1 tsp vanilla extract
- ¼ tsp almond extract
- 3 cups all-purpose flour
- 1 tsp salt
- 2 cans (21 oz each) cherry pie filling
For the glaze:
- 1 cup powdered sugar
- ½ tsp vanilla extract
- ½ tsp almond extract
- 2 tbsp milk
If you prefer a gluten-free option, substitute the all-purpose flour with a 1:1 gluten-free baking flour. For a vegan version, you can replace the butter with plant-based margarine and use flax eggs instead of regular eggs.
How to Make Cherry Pie Bars – Step by Step
Follow these simple steps to create the perfect Cherry Pie Bars. Each step includes some helpful tips to ensure your bars turn out just right!
Step 1: Preheat the Oven
Preheat your oven to 350°F (175°C). Spray a 15x10x1-inch pan with non-stick spray, ensuring your bars won’t stick to the pan.
Step 2: Cream the Butter and Sugar
In a large mixing bowl, use a hand mixer or stand mixer to cream together 1 cup of softened butter and 2 cups of sugar until the mixture is light and fluffy. This step is crucial for achieving a soft, melt-in-your-mouth texture.
Step 3: Add the Eggs
Beat in the 4 eggs, one at a time, ensuring each one is fully incorporated before adding the next. Adding the eggs gradually helps maintain the smooth texture of the batter.
Step 4: Add Vanilla and Almond Extracts
Stir in 1 tsp vanilla extract and ¼ tsp almond extract for that signature flavor that pairs so well with the cherries.
Step 5: Combine Dry Ingredients
In a separate bowl, whisk together 3 cups of all-purpose flour and 1 tsp of salt. Gradually add this dry mixture to the wet ingredients, mixing just until combined.
Step 6: Assemble the Bars
Spread 3 cups of the batter evenly over the bottom of the prepared pan. Top this with the cherry pie filling, spreading it in an even layer. Drop spoonfuls of the remaining batter over the cherry filling, creating pockets of dough across the top.
Step 7: Bake
Place the pan in the preheated oven and bake for 30-35 minutes, or until a toothpick inserted into the center comes out clean. If you’re using a 9×13-inch pan, note that the baking time may increase slightly.
Step 8: Cool the Bars
Once done, remove the bars from the oven and allow them to cool completely on a wire rack.
Step 9: Prepare the Glaze
While the bars cool, prepare the glaze by whisking together 1 cup powdered sugar, ½ tsp vanilla extract, ½ tsp almond extract, and 2 tbsp milk in a small bowl. Mix until smooth.
Step 10: Drizzle and Serve
Drizzle the glaze over the cooled bars. Once the glaze has set, cut the bars into squares, and they’re ready to serve!
Helpful Tips for Cherry Pie Bars
To make the best Cherry Pie Bars, here are a few tips and tricks:
- Use Room Temperature Butter: Softened butter helps create a fluffier dough, ensuring the bars have a tender texture.
- Fresh Ingredients: Opt for high-quality cherry pie filling or even make your own for a fresher taste.
- Customizable Filling: Don’t be afraid to swap out the cherry filling with other fruit fillings like apple, blueberry, or strawberry for a fun variation.
These little tips can make all the difference when making Cherry Pie Bars, ensuring they come out delicious every time!
Cooking Tips for the Best Cherry Pie Bars
To take your Cherry Pie Bars to the next level, consider these cooking techniques:
- Chill the Dough: If you want a thicker, more pastry-like crust, chill the dough for 15-20 minutes before spreading it in the pan.
- Use a Glass Baking Dish: Glass dishes distribute heat more evenly, which can result in a more uniform bake.
- Underbake Slightly: For extra soft bars, remove them from the oven when they are just set in the center. The bars will continue to firm up as they cool.
These simple techniques will help you master the art of baking Cherry Pie Bars every time!
Serving Suggestions for Cherry Pie Bars
Cherry Pie Bars are delicious on their own, but why not elevate them with some fun serving ideas?
- Pair with Whipped Cream: A dollop of whipped cream or a scoop of vanilla ice cream makes a perfect companion to the sweet-tart cherry filling.
- Sprinkle with Powdered Sugar: Just before serving, lightly dust the bars with powdered sugar for a professional bakery-style presentation.
- Serve with Coffee or Tea: These bars are great for afternoon tea parties or a cozy dessert with a cup of coffee.
Make sure to serve these bars at your next gathering for a dessert that’s sure to impress!
Nutritional Information
While these Cherry Pie Bars are a treat, they also offer some nutritional benefits:
- Calories: 250
- Fats: 12g
- Carbohydrates: 35g
- Proteins: 3g
- Vitamins: Rich in Vitamin A from the eggs and butter, with some fiber from the cherry filling.
This nutritional profile makes Cherry Pie Bars a satisfying indulgence that balances flavor with moderate calorie content.
Nutritional Information (per serving)
- Calories: 250
- Total Fat: 12g
- Saturated Fat: 7g
- Cholesterol: 60mg
- Sodium: 150mg
- Total Carbohydrates: 35g
- Dietary Fiber: 1g
- Sugars: 20g
- Protein: 3g
Storage and Leftovers for Cherry Pie Bars
If you have any leftovers (which is rare!), here’s how to store them:
- Storage: Keep the Cherry Pie Bars in an airtight container at room temperature for up to 3 days. For longer storage, refrigerate them for up to a week.
- Freezing: These bars also freeze well! Wrap them individually in plastic wrap and store them in a freezer-safe container for up to 3 months.
- Reheating: To enjoy again, thaw frozen bars overnight in the refrigerator and let them come to room temperature before serving.
Storing your Cherry Pie Bars properly will ensure they stay fresh and delicious!
Frequently Asked Questions (FAQs)
- Can I make Cherry Pie Bars ahead of time?
Yes! These bars can be made a day or two in advance. Just store them in an airtight container and glaze them right before serving for the best results. - Can I use fresh cherries instead of canned pie filling?
Absolutely! If you prefer using fresh cherries, you can make a homemade cherry pie filling by cooking down pitted cherries with sugar and cornstarch until thickened. - How do I make the bars gluten-free?
Simply substitute the all-purpose flour with a gluten-free flour blend. Ensure that your other ingredients, like baking powder, are also gluten-free. - What other flavors can I use?
These bars are versatile! Try using blueberry, apple, or peach pie filling for different flavor variations.
Related Recipes for Cherry Pie Bar Lovers
Looking for more fruity dessert recipes? Try these delicious options:
Conclusion
We hope you enjoy making and sharing these delightful Cherry Pie Bars with your loved ones. With their irresistible combination of buttery crust, sweet cherry filling, and almond glaze, they’re sure to become a household favorite. Feel free to experiment with different fruit fillings and share your variations with us in the comments!
Happy baking, and don’t forget to tag us when you make this recipe!
Print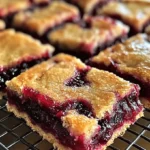
Cherry Pie Bars Recipe: Easy, Sweet & Irresistible Treats
- Author: Patricia
Description
Welcome to another delightful recipe that’s sure to satisfy your sweet tooth! Today, we’re diving into the world of Cherry Pie Bars, a delicious and easy-to-make dessert that’s perfect for any occasion. Whether you’re hosting a potluck, preparing a family gathering, or just craving something sweet, these Cherry Pie Bars will hit the spot. They combine the comforting flavors of cherry pie with the simplicity of a bar recipe, making them an ideal treat for fans of fruity desserts.
Ingredients
- 1 cup butter, softened
- 2 cups sugar
- 4 eggs
- 1 tsp vanilla extract
- ¼ tsp almond extract
- 3 cups all-purpose flour
- 1 tsp salt
- 2 cans (21 oz each) cherry pie filling
For the glaze:
- 1 cup powdered sugar
- ½ tsp vanilla extract
- ½ tsp almond extract
- 2 tbsp milk
If you prefer a gluten-free option, substitute the all-purpose flour with a 1:1 gluten-free baking flour. For a vegan version, you can replace the butter with plant-based margarine and use flax eggs instead of regular eggs.
Instructions
Step 1: Preheat the Oven
Preheat your oven to 350°F (175°C). Spray a 15x10x1-inch pan with non-stick spray, ensuring your bars won’t stick to the pan.
Step 2: Cream the Butter and Sugar
In a large mixing bowl, use a hand mixer or stand mixer to cream together 1 cup of softened butter and 2 cups of sugar until the mixture is light and fluffy. This step is crucial for achieving a soft, melt-in-your-mouth texture.
Step 3: Add the Eggs
Beat in the 4 eggs, one at a time, ensuring each one is fully incorporated before adding the next. Adding the eggs gradually helps maintain the smooth texture of the batter.
Step 4: Add Vanilla and Almond Extracts
Stir in 1 tsp vanilla extract and ¼ tsp almond extract for that signature flavor that pairs so well with the cherries.
Step 5: Combine Dry Ingredients
In a separate bowl, whisk together 3 cups of all-purpose flour and 1 tsp of salt. Gradually add this dry mixture to the wet ingredients, mixing just until combined.
Step 6: Assemble the Bars
Spread 3 cups of the batter evenly over the bottom of the prepared pan. Top this with the cherry pie filling, spreading it in an even layer. Drop spoonfuls of the remaining batter over the cherry filling, creating pockets of dough across the top.
Step 7: Bake
Place the pan in the preheated oven and bake for 30-35 minutes, or until a toothpick inserted into the center comes out clean. If you’re using a 9×13-inch pan, note that the baking time may increase slightly.
Step 8: Cool the Bars
Once done, remove the bars from the oven and allow them to cool completely on a wire rack.
Step 9: Prepare the Glaze
While the bars cool, prepare the glaze by whisking together 1 cup powdered sugar, ½ tsp vanilla extract, ½ tsp almond extract, and 2 tbsp milk in a small bowl. Mix until smooth.
Step 10: Drizzle and Serve
Drizzle the glaze over the cooled bars. Once the glaze has set, cut the bars into squares, and they’re ready to serve!
Equipment

2Pcs Heart Shape Cake Pans, Aluminum Heart Cake Mold, Reusable 10 inch
Buy Now →
Kids Chill Leak-Proof Lunch Box – Included Reusable Ice Pack Keeps Food Cold
Buy Now →Notes
- Use Room Temperature Butter: Softened butter helps create a fluffier dough, ensuring the bars have a tender texture.
- Fresh Ingredients: Opt for high-quality cherry pie filling or even make your own for a fresher taste.
- Customizable Filling: Don’t be afraid to swap out the cherry filling with other fruit fillings like apple, blueberry, or strawberry for a fun variation.
