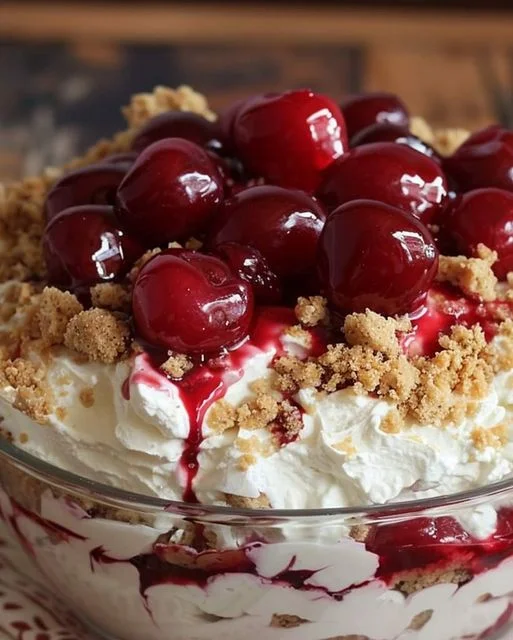
Welcome to a delightful journey through flavors with our sensational Cherry Cheesecake Fluff! This no-bake dessert will whisk you away on a cloud of creamy, dreamy delight that’s perfect for any occasion or sweet craving.
Introduction
The Cherry Cheesecake Fluff combines the creamy texture of traditional cheesecake with the airy lightness of a fluff dessert, making it a unique treat that’s both satisfying and refreshing. Originating from the love for cheesecake and the ease of fluffy desserts, this dish is perfect for those who adore a fruity punch without the hassle of baking. I remember the first time I made this for a family gathering; it was such a hit that it disappeared faster than any other dish on the table!
Ingredients
To prepare this comforting Cherry Cheesecake Fluff, you’ll need:
- For the Fluff:
- 1 (8 oz) package cream cheese, softened
- 1 cup powdered sugar
- 1 teaspoon vanilla extract
- 2 cups whipped topping (like Cool Whip), thawed
- 1 (21 oz) can cherry pie filling
- For the Crumble:
- 1 cup graham cracker crumbs
- 1/4 cup unsalted butter, melted
- 2 tablespoons sugar
Consider substituting the whipped topping with coconut cream for a dairy-free version, although this might slightly alter the texture.
How to Make Cherry Cheesecake Fluff
Follow these steps to create your own delicious Cherry Cheesecake Fluff:
- Make the Crumble: Mix graham cracker crumbs, melted butter, and sugar in a bowl until well combined. Set aside.
- Prepare the Fluff: In a large mixing bowl, beat the cream cheese until smooth. Add powdered sugar and vanilla extract, continuing to beat until well blended. Fold in the whipped topping gently until the mixture is smooth.
- Assemble the Layers: In your serving dish, layer half of the crumble mixture at the bottom. Spread the cream cheese mixture over the crumble layer evenly. Top with the cherry pie filling, spreading it out to cover the cream cheese layer completely. Finish by sprinkling the remaining crumble mixture over the cherry layer.
- Chill: Refrigerate for at least 2 hours before serving to allow the flavors to meld and the dessert to firm up.
Helpful Tips
- Ensure the cream cheese is at room temperature to avoid lumps in your fluff.
- For a firmer set, let the dessert chill overnight.
Cooking Tips
Using a food processor to blend the crumble ingredients can save time and create a more uniform texture. Also, try adding a pinch of cinnamon to the crumble for a hint of warmth.
Serving Suggestions
Serve this lush dessert chilled, perhaps accompanied by a light Moscato or a crisp sparkling water. Garnish with fresh cherries or mint for a pop of color and freshness.
Nutritional Information
Nutritional Information (per serving)
- Calories: 310 kcal
- Carbohydrates: 39 g
- Protein: 3 g
- Fat: 16 g
- Saturated Fat: 9 g
- Polyunsaturated Fat: 1 g
- Monounsaturated Fat: 5 g
- Trans Fat: 0 g
- Cholesterol: 29 mg
- Sodium: 220 mg
- Potassium: 121 mg
- Fiber: 1 g
- Sugar: 28 g
- Vitamin A: 435 IU
- Vitamin C: 1.2 mg
- Calcium: 56 mg
- Iron: 0.7 mg
Storage and Leftovers
Refrigerate: Keep the dessert chilled in an airtight container for up to 3 days. Reheat: Not applicable.
Creatively, leftovers can be served as a sweet dip with graham crackers or fruit slices.
3 Frequently Asked Questions (FAQs)
- Can I use frozen cherries instead of cherry pie filling? Yes, though you may want to add a bit of sugar or thicken it with cornstarch cooked with the cherries to mimic the consistency of pie filling.
- How can I make this dessert vegan? Opt for vegan cream cheese, coconut whipped cream, and a suitable pie filling or fresh fruit compote.
- Is this dessert gluten-free? It can be! Just use gluten-free graham crackers for the crumble.
Related Recipes
Conclusion
Dive into making this easy, irresistible Cherry Cheesecake Fluff and enjoy the rave reviews from friends and family! Don’t forget to share your variations or experiences in the comments below. Happy dessert making!
Print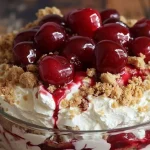
Cherry Cheesecake Fluff Recipe: Easy No-Bake Dessert
Description
Welcome to a delightful journey through flavors with our sensational Cherry Cheesecake Fluff! This no-bake dessert will whisk you away on a cloud of creamy, dreamy delight that’s perfect for any occasion or sweet craving.
Ingredients
- For the Fluff:
- 1 (8 oz) package cream cheese, softened
- 1 cup powdered sugar
- 1 teaspoon vanilla extract
- 2 cups whipped topping (like Cool Whip), thawed
- 1 (21 oz) can cherry pie filling
- For the Crumble:
- 1 cup graham cracker crumbs
- 1/4 cup unsalted butter, melted
- 2 tablespoons sugar
Instructions
- Make the Crumble: Mix graham cracker crumbs, melted butter, and sugar in a bowl until well combined. Set aside.
- Prepare the Fluff: In a large mixing bowl, beat the cream cheese until smooth. Add powdered sugar and vanilla extract, continuing to beat until well blended. Fold in the whipped topping gently until the mixture is smooth.
- Assemble the Layers: In your serving dish, layer half of the crumble mixture at the bottom. Spread the cream cheese mixture over the crumble layer evenly. Top with the cherry pie filling, spreading it out to cover the cream cheese layer completely. Finish by sprinkling the remaining crumble mixture over the cherry layer.
- Chill: Refrigerate for at least 2 hours before serving to allow the flavors to meld and the dessert to firm up.
Notes
- Ensure the cream cheese is at room temperature to avoid lumps in your fluff.
- For a firmer set, let the dessert chill overnight.
