
Hello, holiday bakers and fudge lovers! The festive season is just around the corner, and there’s nothing quite like indulging in some delicious homemade treats. Today, we’re bringing you the perfect recipe for White Chocolate Christmas Fudge – a sweet, creamy, and colorful treat that’s sure to brighten up your dessert table. Whether you’re new to fudge-making or a seasoned pro, this easy recipe will guide you step by step, ensuring you create a dessert that’s as beautiful as it is delicious. Let’s get started on making some Christmas fudge magic!
Introduction
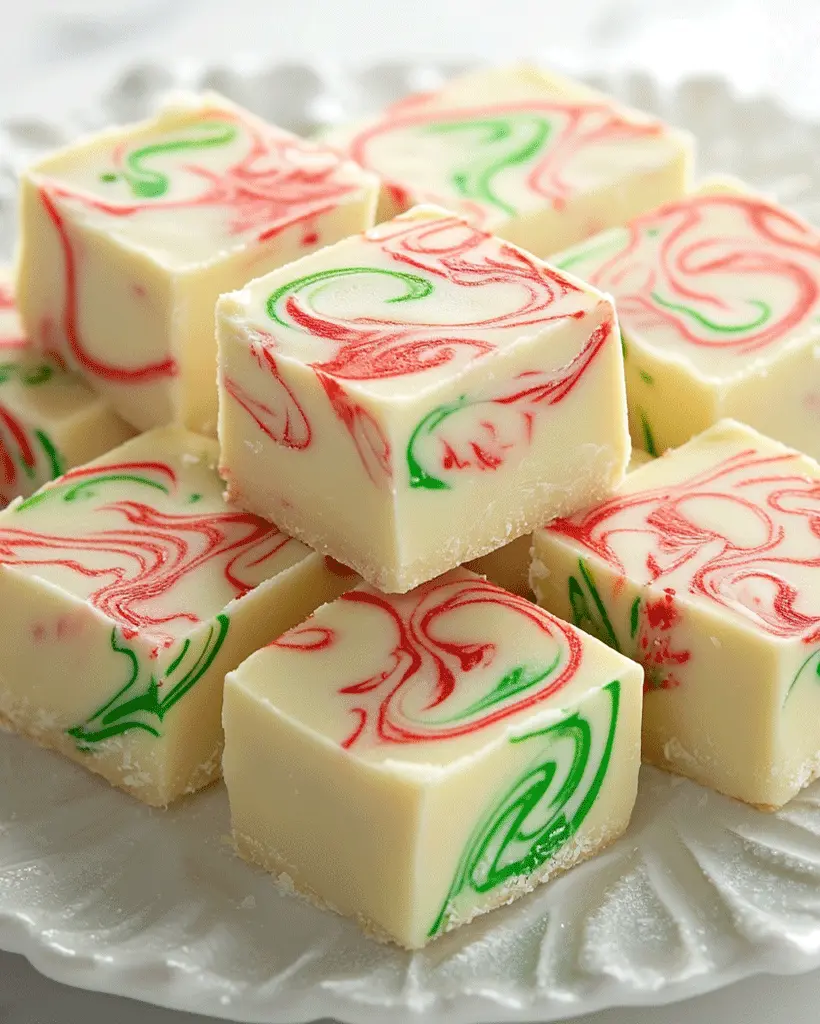
White Chocolate Christmas Fudge is a staple during the holiday season, combining smooth, melt-in-your-mouth white chocolate with festive red and green swirls. This treat not only looks stunning with its marbled layers but is also rich and creamy in taste, making it a holiday favorite for both kids and adults.
Fudge is a traditional confection that originated in the United States in the late 19th century, and over the years, it has evolved into a popular treat for special occasions, especially during Christmas. This recipe adds a modern, colorful twist to the classic fudge by incorporating festive hues and optional sprinkles for an extra burst of holiday cheer. It’s easy to make, requires only a few ingredients, and is perfect for gifting or serving at your holiday parties.
Ingredients for White Chocolate Christmas Fudge
Let’s start by gathering everything you need to make this festive fudge. With only a few simple ingredients, you’ll be amazed at how quickly you can whip up this delightful treat.
- 3 cups white chocolate chips
Make sure to use high-quality white chocolate chips for the best texture and flavor. - 1 (14-ounce) can sweetened condensed milk
The sweetened condensed milk helps give the fudge its creamy, smooth consistency. - 1/2 teaspoon vanilla extract
Adds a hint of warmth and depth to the flavor. - Red and green food coloring
To create the iconic holiday colors. Use gel food coloring for vibrant, saturated hues. - 1/4 cup holiday sprinkles (optional)
If you want to add an extra festive touch, sprinkle these on top before chilling the fudge.
How to Make White Chocolate Christmas Fudge – Step by Step
Making White Chocolate Christmas Fudge is incredibly simple and only takes about 10 minutes of active prep time. Let’s walk through each step to ensure your fudge turns out perfectly creamy and festive.
Step 1: Prepare the Pan
Before you start, line an 8×8-inch baking dish with parchment paper, leaving some overhang on the sides. This makes it easier to lift the fudge out once it’s set.
Step 2: Melt the Chocolate
In a medium saucepan, combine the white chocolate chips and sweetened condensed milk. Stir constantly over low heat until the chocolate is completely melted and the mixture is smooth and silky. Once melted, remove the saucepan from heat and stir in the vanilla extract.
Step 3: Divide and Color the Fudge
Divide the melted chocolate mixture evenly into three bowls. In one bowl, add a few drops of red food coloring, and in the second, add green food coloring. Leave the third bowl as it is. Stir each bowl until the color is fully incorporated.
Step 4: Layer the Fudge
Pour the red fudge mixture into the prepared pan, spreading it evenly. Next, gently spoon the plain white fudge over the red layer. Finally, top the white fudge with the green fudge. Once all the layers are added, use a knife to swirl the colors together, creating a marbled effect.
Step 5: Add Sprinkles (Optional)
If you’re using sprinkles, now is the time to add them. Sprinkle them evenly over the top of the fudge before it starts to firm up.
Step 6: Chill and Set
Refrigerate the fudge for at least 2 hours, or until it’s firm. Once set, lift the fudge out of the pan using the parchment paper overhang. Cut it into small squares, and you’re ready to serve!
Helpful Tips for White Chocolate Christmas Fudge
To ensure your White Chocolate Christmas Fudge turns out perfectly, here are a few helpful tips:
- Use high-quality white chocolate chips. The quality of the chocolate makes a big difference in the texture and taste of your fudge. Opt for premium brands that melt smoothly.
- Avoid overheating the chocolate. Melt the white chocolate over low heat to prevent it from burning or seizing.
- Gel food coloring works best. It provides more vibrant colors without altering the texture of the fudge. A little goes a long way, so start with a few drops and adjust as needed.
Cooking Tips for the Best White Chocolate Christmas Fudge
For truly perfect Christmas fudge, consider these expert cooking techniques:
- Use a heavy-bottomed saucepan. This helps distribute heat evenly, preventing hot spots that could cause the chocolate to burn.
- Stir constantly. While melting the chocolate, stir continuously to avoid any burning or uneven melting.
- Chill thoroughly. Be patient and allow the fudge to chill for the full two hours or longer. This ensures the fudge is firm enough to cut cleanly.
Serving Suggestions for White Chocolate Christmas Fudge
This delightful White Chocolate Christmas Fudge makes for the perfect holiday treat. Here are some serving suggestions:
- Pair with hot cocoa or coffee. The sweetness of the fudge complements warm holiday beverages perfectly.
- Serve on a holiday dessert platter. Pair it with other festive treats like cookies, gingerbread, and peppermint bark.
- Gift it! Package the fudge in festive boxes or bags, tied with a ribbon, and give it to family and friends as a homemade holiday gift.
Nutritional Information
While White Chocolate Christmas Fudge is a treat, it’s always helpful to know the nutritional content. Here’s a breakdown:
Nutritional Information (per serving):
- Calories: 130
- Fat: 6g
- Saturated Fat: 4g
- Carbohydrates: 18g
- Sugar: 16g
- Protein: 2g
Storage and Leftovers for White Chocolate Christmas Fudge
Fudge is an excellent make-ahead dessert, and storing it properly ensures it stays fresh for longer.
- Refrigeration: Store your White Chocolate Christmas Fudge in an airtight container in the fridge for up to one week. This keeps it fresh and firm.
- Freezing: If you want to save some fudge for later, freeze it! Wrap the fudge tightly in plastic wrap, then place it in a freezer-safe container. It will keep for up to three months. When you’re ready to enjoy, let it thaw in the fridge overnight.
- Reheating: Fudge doesn’t need to be reheated, but if you prefer it softer, let it sit at room temperature for a few minutes before serving.
Frequently Asked Questions (FAQs) for White Chocolate Christmas Fudge
1. Can I make this fudge with milk or dark chocolate?
Yes! While the recipe is designed for white chocolate, you can easily substitute it with milk or dark chocolate for a different flavor. Keep in mind that the color layers won’t be as vibrant.
2. Can I add other flavors to this fudge?
Absolutely! For a fun twist, try adding a few drops of peppermint extract or orange zest to the fudge mixture.
3. How long does White Chocolate Christmas Fudge last?
Stored in the refrigerator, the fudge will stay fresh for up to one week. You can also freeze it for up to three months.
4. Do I have to use food coloring?
No, food coloring is optional. If you prefer a classic white fudge without the holiday colors, you can leave out the food coloring entirely.
Related Recipes for White Chocolate Christmas Fudge Lovers
If you loved this White Chocolate Christmas Fudge recipe, be sure to check out these related holiday treats:
Conclusion
We hope you enjoy making this delightful White Chocolate Christmas Fudge as much as we enjoyed sharing it with you. It’s the perfect blend of creamy white chocolate and festive fun, guaranteed to brighten up any holiday gathering. Don’t forget to share your results with us and let us know if you added your own creative twist to the recipe!
Happy holidays, and may your season be filled with sweet treats like this delicious Christmas fudge!
Print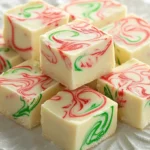
White Chocolate Christmas Fudge – Festive Holiday Treat
Description
Hello, holiday bakers and fudge lovers! The festive season is just around the corner, and there’s nothing quite like indulging in some delicious homemade treats. Today, we’re bringing you the perfect recipe for White Chocolate Christmas Fudge – a sweet, creamy, and colorful treat that’s sure to brighten up your dessert table. Whether you’re new to fudge-making or a seasoned pro, this easy recipe will guide you step by step, ensuring you create a dessert that’s as beautiful as it is delicious. Let’s get started on making some Christmas fudge magic!
Ingredients
- 3 cups white chocolate chips
Make sure to use high-quality white chocolate chips for the best texture and flavor. - 1 (14-ounce) can sweetened condensed milk
The sweetened condensed milk helps give the fudge its creamy, smooth consistency. - 1/2 teaspoon vanilla extract
Adds a hint of warmth and depth to the flavor. - Red and green food coloring
To create the iconic holiday colors. Use gel food coloring for vibrant, saturated hues. - 1/4 cup holiday sprinkles (optional)
If you want to add an extra festive touch, sprinkle these on top before chilling the fudge.
Instructions
Step 1: Prepare the Pan
Before you start, line an 8×8-inch baking dish with parchment paper, leaving some overhang on the sides. This makes it easier to lift the fudge out once it’s set.
Step 2: Melt the Chocolate
In a medium saucepan, combine the white chocolate chips and sweetened condensed milk. Stir constantly over low heat until the chocolate is completely melted and the mixture is smooth and silky. Once melted, remove the saucepan from heat and stir in the vanilla extract.
Step 3: Divide and Color the Fudge
Divide the melted chocolate mixture evenly into three bowls. In one bowl, add a few drops of red food coloring, and in the second, add green food coloring. Leave the third bowl as it is. Stir each bowl until the color is fully incorporated.
Step 4: Layer the Fudge
Pour the red fudge mixture into the prepared pan, spreading it evenly. Next, gently spoon the plain white fudge over the red layer. Finally, top the white fudge with the green fudge. Once all the layers are added, use a knife to swirl the colors together, creating a marbled effect.
Step 5: Add Sprinkles (Optional)
If you’re using sprinkles, now is the time to add them. Sprinkle them evenly over the top of the fudge before it starts to firm up.
Step 6: Chill and Set
Refrigerate the fudge for at least 2 hours, or until it’s firm. Once set, lift the fudge out of the pan using the parchment paper overhang. Cut it into small squares, and you’re ready to serve!
Equipment

2Pcs Heart Shape Cake Pans, Aluminum Heart Cake Mold, Reusable 10 inch
Buy Now →
Kids Chill Leak-Proof Lunch Box – Included Reusable Ice Pack Keeps Food Cold
Buy Now →Notes
- Use high-quality white chocolate chips. The quality of the chocolate makes a big difference in the texture and taste of your fudge. Opt for premium brands that melt smoothly.
- Avoid overheating the chocolate. Melt the white chocolate over low heat to prevent it from burning or seizing.
- Gel food coloring works best. It provides more vibrant colors without altering the texture of the fudge. A little goes a long way, so start with a few drops and adjust as needed.
