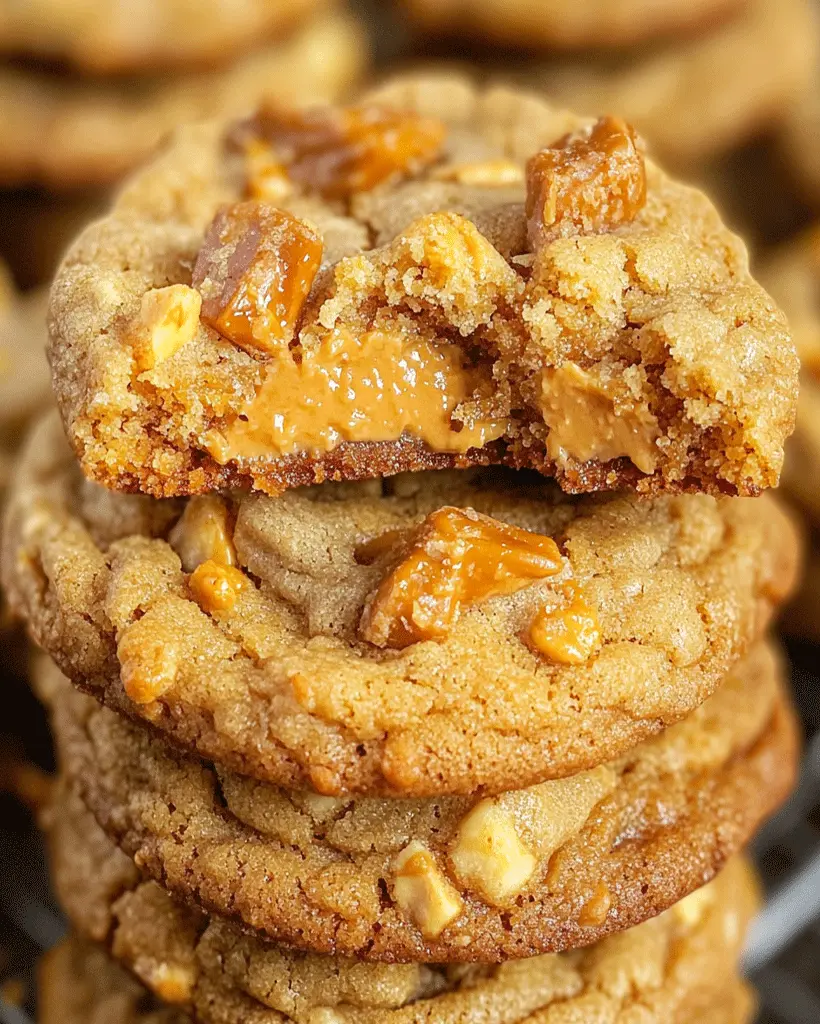
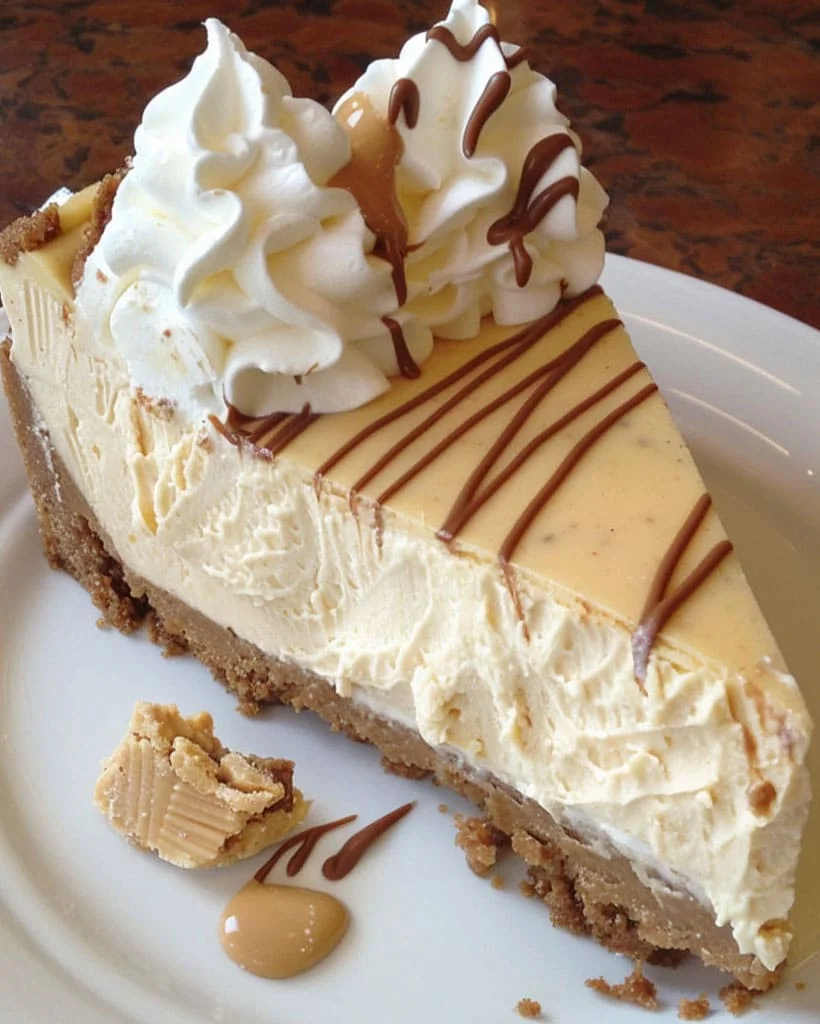
Welcome to another delicious adventure in baking! If you’re a fan of peanut butter and the unmistakable crunch of Butterfinger candy, you’re in for a treat today. These Irresistible Peanut Butter Butterfinger Cookies are the perfect combination of soft, chewy, and crunchy. Imagine biting into a cookie that’s packed with creamy peanut butter goodness, only to be surprised by chunks of crispy, chocolatey Butterfinger bars in every bite. Let’s dive into this mouthwatering recipe that’s sure to satisfy all your cookie cravings.
Introduction
There’s something universally comforting about a homemade cookie, and when you add the magic of peanut butter and Butterfinger candy, you’ve got a dessert that’s simply irresistible. Peanut Butter Butterfinger Cookies are a delightful twist on the classic peanut butter cookie, infusing the sweetness and crunch of Butterfinger into each bite. Whether you’re baking these for a family gathering, a cozy snack at home, or to share with friends, they are sure to be a hit.
What makes these cookies stand out is their unique balance of textures and flavors. The soft chew of the peanut butter dough, combined with the crispy, candy-coated bits of Butterfinger, offers an unforgettable experience for any cookie lover. The best part? They’re incredibly easy to make, so even beginners in the kitchen can whip up a batch in no time. Get ready for a new favorite cookie recipe that will have everyone coming back for more!
Ingredients for Peanut Butter Butterfinger Cookies
Here’s what you’ll need to create these delectable Peanut Butter Butterfinger Cookies:
- 1 cup unsalted butter, softened
- 1 cup granulated sugar
- 1 cup brown sugar, packed
- 2 large eggs
- 1 teaspoon vanilla extract
- 1 cup creamy peanut butter
- 2 1/2 cups all-purpose flour
- 1 teaspoon baking soda
- 1/2 teaspoon salt
- 2 cups chopped Butterfinger candy bars
Optional Substitutions:
- If you’re looking to make these cookies gluten-free, substitute the all-purpose flour with a 1:1 gluten-free baking blend.
- For a dairy-free version, use a plant-based butter substitute.
- Prefer almond butter over peanut butter? Feel free to swap them, though the taste will be slightly different.
These simple ingredients come together to create a batch of cookies that are as indulgent as they are easy to prepare.
How to Make Peanut Butter Butterfinger Cookies – Step by Step
Follow these steps to create the perfect Peanut Butter Butterfinger Cookies at home:
Step 1: Preheat Your Oven
Start by preheating your oven to 350°F (175°C) and line a baking sheet with parchment paper for easy cleanup.
Step 2: Cream the Butter and Sugars
In a large mixing bowl, combine 1 cup of softened butter, 1 cup of granulated sugar, and 1 cup of packed brown sugar. Using a hand mixer or stand mixer, beat the mixture until it becomes light and fluffy—this will take about 2-3 minutes.
Step 3: Add the Eggs and Vanilla
Add 2 large eggs, one at a time, to the butter and sugar mixture, beating well after each addition. Then, mix in 1 teaspoon of vanilla extract for that extra touch of flavor.
Step 4: Incorporate the Peanut Butter
Next, add 1 cup of creamy peanut butter and beat until the mixture is smooth and fully combined. Make sure to scrape down the sides of the bowl to ensure everything is mixed evenly.
Step 5: Combine Dry Ingredients
In a separate bowl, whisk together 2 1/2 cups of all-purpose flour, 1 teaspoon of baking soda, and 1/2 teaspoon of salt. Gradually add the dry ingredients to the wet ingredients, mixing on low speed until just combined. Be careful not to overmix!
Step 6: Add the Butterfinger Pieces
Gently fold in 2 cups of chopped Butterfinger candy bars, making sure the pieces are evenly distributed throughout the dough. This step ensures that each cookie is packed with delicious Butterfinger crunch.
Step 7: Scoop and Bake
Using a cookie scoop or tablespoon, scoop out portions of dough onto your prepared baking sheet. Place them about 2 inches apart, as the cookies will spread during baking. Bake in the preheated oven for 10-12 minutes, or until the edges are golden brown. The centers may still look soft, but they will firm up as they cool.
Step 8: Cool and Enjoy
Allow the cookies to cool on the baking sheet for 5 minutes before transferring them to a wire rack to cool completely. Enjoy warm, or store them in an airtight container for later!
Helpful Tips for Peanut Butter Butterfinger Cookies
To make your Peanut Butter Butterfinger Cookies turn out perfectly every time, keep these tips in mind:
- Room Temperature Ingredients: Ensure your butter and eggs are at room temperature. This helps them mix together more smoothly, resulting in a softer dough.
- Don’t Overmix: Once you add the flour, mix the dough just until combined. Overmixing can lead to dense, tough cookies instead of the soft, chewy texture you want.
- Chop Butterfinger Pieces Evenly: For the best distribution of Butterfinger pieces, chop them into small, bite-sized chunks. This ensures each cookie has a nice balance of candy bits without overwhelming the dough.
Cooking Tips for the Best Peanut Butter Butterfinger Cookies
Here are some extra tips and tricks to make sure your Peanut Butter Butterfinger Cookies are the best they can be:
- Chilling the Dough: If you have time, chill the dough for 30 minutes before baking. This can help prevent the cookies from spreading too much and gives them a chewier texture.
- Cookie Scoop for Even Baking: Using a cookie scoop ensures that all your cookies are the same size, which helps them bake evenly.
- Experiment with Texture: If you prefer a slightly crunchier cookie, bake them for an additional 1-2 minutes. For ultra-soft cookies, pull them out of the oven just as the edges start to turn golden, even if the centers still look soft.
Serving Suggestions for Peanut Butter Butterfinger Cookies
Peanut Butter Butterfinger Cookies are a treat all on their own, but here are some fun ways to serve them:
- With Milk: The classic combo! These cookies pair perfectly with a tall glass of cold milk.
- Ice Cream Sandwiches: Turn your cookies into decadent ice cream sandwiches by placing a scoop of vanilla or chocolate ice cream between two cookies.
- Crumbled Over Ice Cream: Crumble a few of these cookies over your favorite ice cream for a crunchy, peanut buttery topping.
- Holiday Treats: Serve these cookies as part of a holiday dessert platter. Their crunchy texture and sweet flavor make them perfect for any festive occasion.
Nutritional Information for Peanut Butter Butterfinger Cookies
While these cookies are a sweet indulgence, they do offer some protein from the peanut butter. Here’s a brief breakdown of the Nutritional Info for Peanut Butter Butterfinger Cookies:
Each serving (1 cookie) contains:
- Calories: 280 kcal
- Total Fat: 15g
- Saturated Fat: 7g
- Cholesterol: 30mg
- Sodium: 180mg
- Total Carbohydrates: 35g
- Sugars: 22g
- Protein: 4g
Storage and Leftovers for Peanut Butter Butterfinger Cookies
If you have leftovers (which isn’t likely!), here’s how to store your Peanut Butter Butterfinger Cookies:
- Room Temperature: Store the cookies in an airtight container at room temperature for up to 5 days. They’ll stay soft and chewy.
- Freezer Storage: To extend their shelf life, freeze the cookies for up to 3 months. Wrap each cookie individually in plastic wrap, then place them in a freezer-safe bag.
- Reheating: If you like your cookies warm, you can reheat them in the microwave for 10-15 seconds before enjoying. This brings back that fresh-baked texture.
Frequently Asked Questions (FAQs) for Peanut Butter Butterfinger Cookies
1. Can I use crunchy peanut butter instead of creamy?
Yes! Using crunchy peanut butter will add an extra texture to the cookies, enhancing the crunchiness of the Butterfinger pieces.
2. How can I make these cookies gluten-free?
To make gluten-free Peanut Butter Butterfinger Cookies, simply substitute the all-purpose flour with a 1:1 gluten-free baking mix.
3. Can I freeze the dough for later use?
Absolutely! You can freeze the cookie dough balls on a baking sheet and then transfer them to a freezer bag. When ready to bake, simply add an extra minute or two to the baking time.
4. Can I use other types of candy in this recipe?
Yes, feel free to get creative! You can substitute the Butterfinger pieces with other candy bars like Snickers, Reese’s, or Milky Way for a fun twist.
Related Recipes for Peanut Butter Lovers
If you loved these Peanut Butter Butterfinger Cookies, here are two similar recipes to try next:
Conclusion
There you have it—a simple yet incredibly flavorful recipe for Peanut Butter Butterfinger Cookies that’s sure to become a family favorite. With their soft and chewy texture, combined with the crunchy sweetness of Butterfinger pieces, these cookies are a must-try. Don’t forget to share your creations with us in the comments below, or let us know how you made these cookies your own with fun variations.
Happy baking, and enjoy every bite of these Irresistible Peanut Butter Butterfinger Cookies!
Print
Peanut Butter Butterfinger Cookies – Soft & Chewy Recipe
Description
Welcome to another delicious adventure in baking! If you’re a fan of peanut butter and the unmistakable crunch of Butterfinger candy, you’re in for a treat today. These Irresistible Peanut Butter Butterfinger Cookies are the perfect combination of soft, chewy, and crunchy. Imagine biting into a cookie that’s packed with creamy peanut butter goodness, only to be surprised by chunks of crispy, chocolatey Butterfinger bars in every bite. Let’s dive into this mouthwatering recipe that’s sure to satisfy all your cookie cravings.
Ingredients
- 1 cup unsalted butter, softened
- 1 cup granulated sugar
- 1 cup brown sugar, packed
- 2 large eggs
- 1 teaspoon vanilla extract
- 1 cup creamy peanut butter
- 2 1/2 cups all-purpose flour
- 1 teaspoon baking soda
- 1/2 teaspoon salt
- 2 cups chopped Butterfinger candy bars
Optional Substitutions:
- If you’re looking to make these cookies gluten-free, substitute the all-purpose flour with a 1:1 gluten-free baking blend.
- For a dairy-free version, use a plant-based butter substitute.
- Prefer almond butter over peanut butter? Feel free to swap them, though the taste will be slightly different.
Instructions
Step 1: Preheat Your Oven
Start by preheating your oven to 350°F (175°C) and line a baking sheet with parchment paper for easy cleanup.
Step 2: Cream the Butter and Sugars
In a large mixing bowl, combine 1 cup of softened butter, 1 cup of granulated sugar, and 1 cup of packed brown sugar. Using a hand mixer or stand mixer, beat the mixture until it becomes light and fluffy—this will take about 2-3 minutes.
Step 3: Add the Eggs and Vanilla
Add 2 large eggs, one at a time, to the butter and sugar mixture, beating well after each addition. Then, mix in 1 teaspoon of vanilla extract for that extra touch of flavor.
Step 4: Incorporate the Peanut Butter
Next, add 1 cup of creamy peanut butter and beat until the mixture is smooth and fully combined. Make sure to scrape down the sides of the bowl to ensure everything is mixed evenly.
Step 5: Combine Dry Ingredients
In a separate bowl, whisk together 2 1/2 cups of all-purpose flour, 1 teaspoon of baking soda, and 1/2 teaspoon of salt. Gradually add the dry ingredients to the wet ingredients, mixing on low speed until just combined. Be careful not to overmix!
Step 6: Add the Butterfinger Pieces
Gently fold in 2 cups of chopped Butterfinger candy bars, making sure the pieces are evenly distributed throughout the dough. This step ensures that each cookie is packed with delicious Butterfinger crunch.
Step 7: Scoop and Bake
Using a cookie scoop or tablespoon, scoop out portions of dough onto your prepared baking sheet. Place them about 2 inches apart, as the cookies will spread during baking. Bake in the preheated oven for 10-12 minutes, or until the edges are golden brown. The centers may still look soft, but they will firm up as they cool.
Step 8: Cool and Enjoy
Allow the cookies to cool on the baking sheet for 5 minutes before transferring them to a wire rack to cool completely. Enjoy warm, or store them in an airtight container for later!
Equipment

2Pcs Heart Shape Cake Pans, Aluminum Heart Cake Mold, Reusable 10 inch
Buy Now →
Kids Chill Leak-Proof Lunch Box – Included Reusable Ice Pack Keeps Food Cold
Buy Now →Notes
- Room Temperature Ingredients: Ensure your butter and eggs are at room temperature. This helps them mix together more smoothly, resulting in a softer dough.
- Don’t Overmix: Once you add the flour, mix the dough just until combined. Overmixing can lead to dense, tough cookies instead of the soft, chewy texture you want.
- Chop Butterfinger Pieces Evenly: For the best distribution of Butterfinger pieces, chop them into small, bite-sized chunks. This ensures each cookie has a nice balance of candy bits without overwhelming the dough.
