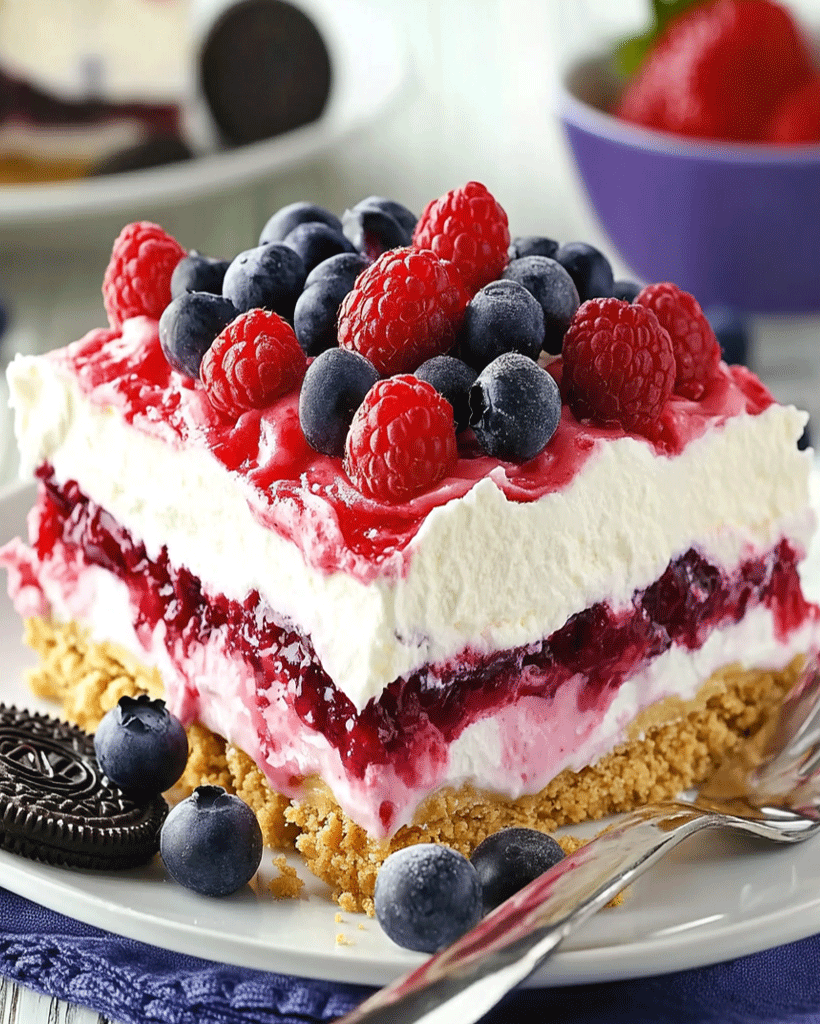
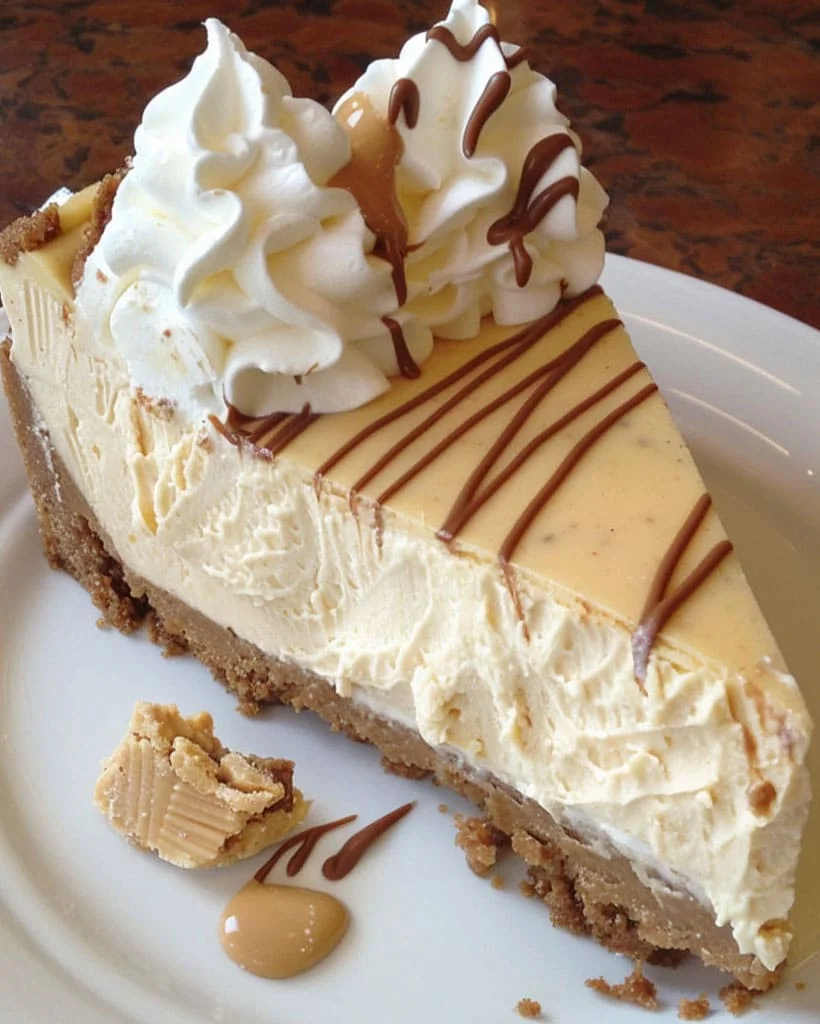
Welcome to the world of Layered Berry Bliss No-Bake Cheesecake, where every bite delivers a taste of summer with its rich creaminess and burst of berry goodness! This delightful dessert combines the velvety smoothness of cheesecake with a refreshing layer of mixed berry jam and a buttery graham cracker crust—all without turning on the oven! Whether you’re hosting a party or simply craving a sweet treat, this No-Bake Berry Cheesecake is a quick and easy recipe that anyone can make. Let’s dive into creating this simple yet stunning dessert that’s sure to impress your family and friends!
Introduction
If you’re looking for a refreshing dessert that embodies the sweetness of summer, this Layered Berry Bliss No-Bake Cheesecake is just what you need. Originating from the timeless tradition of no-bake desserts, this cheesecake offers a lighter, easier alternative to the traditional baked cheesecake. With its creamy layers, vibrant berry jam, and crumbly graham cracker crust, this dish is a showstopper on any dessert table. It’s perfect for those who love cheesecake but don’t want to go through the trouble of baking one, especially during the hot summer months. Plus, the combination of berries and cream is a crowd-pleaser!
This No-Bake Berry Cheesecake is not only incredibly easy to make, but it also provides a canvas for culinary creativity. You can experiment with different types of berries, jams, and toppings to customize this recipe to your taste. Whether you prefer raspberries, blueberries, or strawberries, this cheesecake will satisfy your fruity cravings. Plus, the no-bake nature of the dessert makes it perfect for novice bakers or anyone short on time. If you’re a cheesecake lover who wants a refreshing twist on the classic dessert, this is the recipe for you!
Ingredients for Layered Berry Bliss No-Bake Cheesecake
To create the perfect Layered Berry Bliss No-Bake Cheesecake, you’ll need the following ingredients:
- 2 cups graham cracker crumbs – for the base of the crust. Feel free to use gluten-free crackers if needed.
- ½ cup melted butter – to bind the graham cracker crumbs into a firm crust.
- ¼ cup sugar – to sweeten the crust.
- 16 oz cream cheese, softened – the rich, creamy foundation of your cheesecake.
- 1 cup powdered sugar – to add the right amount of sweetness to the cream cheese layer.
- 1 tsp vanilla extract – enhances the flavor of the cream cheese mixture.
- 2 cups heavy whipping cream – for whipping into light, fluffy peaks that give the cheesecake its airy texture.
- 1 cup mixed berry jam (raspberry, blueberry) – the fruity layer that brings a burst of flavor to the cheesecake.
- Fresh raspberries and blueberries for topping – these add a fresh, juicy garnish.
Optional Substitutions:
- If you’re lactose intolerant, you can use dairy-free cream cheese and whipped topping.
- Gluten-free graham crackers can be used to make this recipe suitable for gluten-sensitive individuals.
How to Make Layered Berry Bliss No-Bake Cheesecake – Step by Step
Creating this delightful Layered Berry Bliss No-Bake Cheesecake is as easy as following these steps:
- Prepare the Crust:
In a medium bowl, combine the graham cracker crumbs, melted butter, and sugar. Stir the mixture until the crumbs are evenly coated in butter and begin to clump together. Press this mixture firmly into the bottom of a 9×13 inch pan to form the crust. Refrigerate for at least 10 minutes to allow the crust to firm up.Pro tip: Use a flat-bottomed glass to press the crust evenly into the pan to create a smooth surface for the layers.
- Make the Cream Cheese Layer:
In a large mixing bowl, beat the softened cream cheese, powdered sugar, and vanilla extract together until smooth and creamy. This will be the creamy layer that holds the cheesecake together. - Whip the Cream:
In a separate bowl, whip the heavy cream until stiff peaks form. This is a crucial step for achieving the light and airy texture of the cheesecake. Once the whipped cream is ready, gently fold it into the cream cheese mixture, ensuring that the mixture stays light and fluffy. - Assemble the Cheesecake:
Spread half of the cream cheese mixture evenly over the prepared graham cracker crust. Next, spread the mixed berry jam over the cream cheese layer, making sure to distribute it evenly. Finally, spread the remaining cream cheese mixture on top of the berry jam layer. Smooth out the top with a spatula. - Add the Toppings:
Garnish the top of the cheesecake with fresh raspberries and blueberries for an extra burst of flavor and visual appeal. - Chill and Set:
Refrigerate the cheesecake for at least 4 hours, or until the layers have fully set. This will allow the flavors to meld together and give the cheesecake its firm, sliceable texture. - Serve:
Once set, slice the cheesecake into squares and serve. Enjoy your creamy, fruity, no-bake masterpiece!
Helpful Tips for No-Bake Berry Cheesecake
Here are a few tips to ensure that your Layered Berry Bliss No-Bake Cheesecake turns out perfectly every time:
- Softening the cream cheese: Make sure the cream cheese is fully softened before mixing. This will prevent lumps and ensure a smooth, creamy filling.
- Chilling the crust: Chilling the graham cracker crust before adding the filling helps it stay firm and prevents it from crumbling when sliced.
- Folding the whipped cream: When folding the whipped cream into the cream cheese mixture, do so gently. Overmixing can cause the whipped cream to deflate, resulting in a dense cheesecake.
- Jam consistency: If your berry jam is too thick, you can gently heat it to make it easier to spread over the cream cheese layer.
Cooking Tips for the Best No-Bake Cheesecake
To elevate your No-Bake Berry Cheesecake, here are a few expert techniques:
- Use high-quality ingredients: Fresh berries, premium cream cheese, and good-quality vanilla extract make a noticeable difference in flavor.
- Chill overnight: For best results, let the cheesecake chill in the refrigerator overnight. This gives the dessert time to set fully and allows the flavors to meld together.
- Add a gelatin layer: If you want a firmer consistency, you can add a bit of gelatin to the cream cheese mixture. Dissolve unflavored gelatin in hot water and mix it into the cream cheese layer before assembling the cheesecake.
Serving Suggestions for Layered Berry Bliss No-Bake Cheesecake
This refreshing No-Bake Berry Cheesecake is the perfect dessert for a summer BBQ, family gathering, or casual dinner. Serve it chilled with a side of fresh whipped cream or a drizzle of berry coulis. For a festive presentation, sprinkle powdered sugar over the fresh berries and garnish with a sprig of mint.
Pair this cheesecake with a glass of cold lemonade, iced tea, or even a light sparkling wine for an extra-special treat. The tartness of the berries pairs beautifully with the sweetness of the cheesecake, making it a hit for any occasion.
Nutritional Information
The Layered Berry Bliss No-Bake Cheesecake offers a balance of indulgence and fresh fruit goodness. Here’s a breakdown of the nutritional value per serving:
- Calories: 320 kcal
- Total Fat: 24g
- Saturated Fat: 14g
- Cholesterol: 80mg
- Sodium: 250mg
- Carbohydrates: 30g
- Fiber: 1g
- Sugars: 18g
- Protein: 4g
Storage and Leftovers for Layered Berry Bliss No-Bake Cheesecake
To store your Layered Berry Bliss No-Bake Cheesecake, cover the pan tightly with plastic wrap or aluminum foil and refrigerate. The cheesecake can be stored for up to 3 days in the fridge, though it’s best enjoyed within the first two days for optimal freshness.
If you have leftovers and would like to store them for longer, you can freeze the cheesecake. Cut the cheesecake into individual slices, wrap each slice tightly in plastic wrap, and place them in an airtight container. When ready to enjoy, simply thaw a slice in the refrigerator overnight.
Frequently Asked Questions (FAQs) for No-Bake Cheesecake
1. Can I use other types of berries for this cheesecake?
Absolutely! While this recipe uses raspberries and blueberries, you can easily swap in strawberries, blackberries, or even mixed berries for a unique flavor profile.
2. Can I make this cheesecake ahead of time?
Yes, this cheesecake is perfect for making ahead! You can prepare it a day or two in advance and store it in the fridge until you’re ready to serve.
3. Is there a dairy-free version of this cheesecake?
Yes! To make a dairy-free version, substitute the cream cheese with a dairy-free alternative, such as cashew cream cheese, and use coconut cream instead of heavy cream.
4. Can I use a different type of crust?
Certainly! You can use a cookie crust, such as Oreo crumbs, or even a nut-based crust if you prefer a different texture or flavor.
Related Recipes for Cheesecake Lovers
For more delicious cheesecake variations, check out these similar recipes:
Conclusion
Now that you’ve discovered how easy and delicious it is to make this Layered Berry Bliss No-Bake Cheesecake, it’s time to give it a try! With its creamy layers, fresh berry topping, and buttery graham cracker crust, this dessert is sure to become a favorite in your household. Plus, it’s perfect for any occasion, whether you’re celebrating a birthday, hosting a dinner party, or simply treating yourself to something sweet.
Don’t forget to share your results and personal twists on this recipe in the comments below! We’d love to hear about your favorite flavor combinations or any creative garnishes you’ve added. Happy no-baking!
Print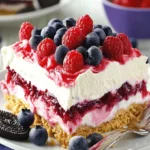
No-Bake Berry Cheesecake: Easy Layered Berry Bliss Recipe
Description
Welcome to the world of Layered Berry Bliss No-Bake Cheesecake, where every bite delivers a taste of summer with its rich creaminess and burst of berry goodness! This delightful dessert combines the velvety smoothness of cheesecake with a refreshing layer of mixed berry jam and a buttery graham cracker crust—all without turning on the oven! Whether you’re hosting a party or simply craving a sweet treat, this No-Bake Berry Cheesecake is a quick and easy recipe that anyone can make. Let’s dive into creating this simple yet stunning dessert that’s sure to impress your family and friends!
Ingredients
- 2 cups graham cracker crumbs – for the base of the crust. Feel free to use gluten-free crackers if needed.
- ½ cup melted butter – to bind the graham cracker crumbs into a firm crust.
- ¼ cup sugar – to sweeten the crust.
- 16 oz cream cheese, softened – the rich, creamy foundation of your cheesecake.
- 1 cup powdered sugar – to add the right amount of sweetness to the cream cheese layer.
- 1 tsp vanilla extract – enhances the flavor of the cream cheese mixture.
- 2 cups heavy whipping cream – for whipping into light, fluffy peaks that give the cheesecake its airy texture.
- 1 cup mixed berry jam (raspberry, blueberry) – the fruity layer that brings a burst of flavor to the cheesecake.
- Fresh raspberries and blueberries for topping – these add a fresh, juicy garnish.
Optional Substitutions:
- If you’re lactose intolerant, you can use dairy-free cream cheese and whipped topping.
- Gluten-free graham crackers can be used to make this recipe suitable for gluten-sensitive individuals.
Instructions
- Prepare the Crust:
In a medium bowl, combine the graham cracker crumbs, melted butter, and sugar. Stir the mixture until the crumbs are evenly coated in butter and begin to clump together. Press this mixture firmly into the bottom of a 9×13 inch pan to form the crust. Refrigerate for at least 10 minutes to allow the crust to firm up.Pro tip: Use a flat-bottomed glass to press the crust evenly into the pan to create a smooth surface for the layers.
- Make the Cream Cheese Layer:
In a large mixing bowl, beat the softened cream cheese, powdered sugar, and vanilla extract together until smooth and creamy. This will be the creamy layer that holds the cheesecake together. - Whip the Cream:
In a separate bowl, whip the heavy cream until stiff peaks form. This is a crucial step for achieving the light and airy texture of the cheesecake. Once the whipped cream is ready, gently fold it into the cream cheese mixture, ensuring that the mixture stays light and fluffy. - Assemble the Cheesecake:
Spread half of the cream cheese mixture evenly over the prepared graham cracker crust. Next, spread the mixed berry jam over the cream cheese layer, making sure to distribute it evenly. Finally, spread the remaining cream cheese mixture on top of the berry jam layer. Smooth out the top with a spatula. - Add the Toppings:
Garnish the top of the cheesecake with fresh raspberries and blueberries for an extra burst of flavor and visual appeal. - Chill and Set:
Refrigerate the cheesecake for at least 4 hours, or until the layers have fully set. This will allow the flavors to meld together and give the cheesecake its firm, sliceable texture. - Serve:
Once set, slice the cheesecake into squares and serve. Enjoy your creamy, fruity, no-bake masterpiece!
Equipment
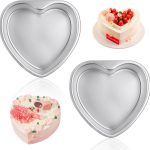
2Pcs Heart Shape Cake Pans, Aluminum Heart Cake Mold, Reusable 10 inch
Buy Now →
Kids Chill Leak-Proof Lunch Box – Included Reusable Ice Pack Keeps Food Cold
Buy Now →Notes
- Softening the cream cheese: Make sure the cream cheese is fully softened before mixing. This will prevent lumps and ensure a smooth, creamy filling.
- Chilling the crust: Chilling the graham cracker crust before adding the filling helps it stay firm and prevents it from crumbling when sliced.
- Folding the whipped cream: When folding the whipped cream into the cream cheese mixture, do so gently. Overmixing can cause the whipped cream to deflate, resulting in a dense cheesecake.
- Jam consistency: If your berry jam is too thick, you can gently heat it to make it easier to spread over the cream cheese layer.
