Hey there, cheesecake and banana lovers!Welcome to a recipe that brings together two dessert icons into one delightful bite—our Creamy Banana Pudding Cheesecake Bars! These bars are like a hug in dessert form: creamy, dreamy, and packed with the nostalgic taste of banana pudding layered on a cheesecake foundation. Whether you’re a fan of cheesecake, banana pudding, or simply crave a unique twist on classic sweets, this is a treat you won’t want to miss. So, let’s dive into the magic of creating these Banana Pudding Cheesecake Bars that are bound to be a hit for any occasion.
Introduction
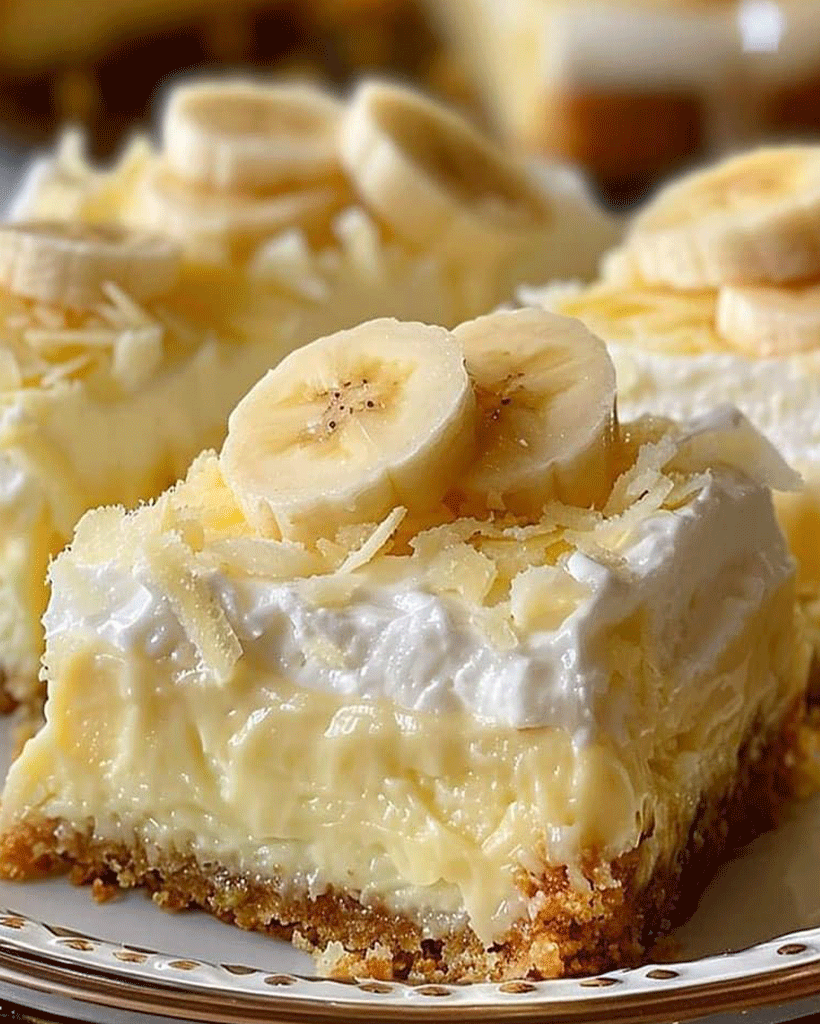
Imagine the smoothness of classic cheesecake meeting the rich flavor of banana pudding. Our Creamy Banana Pudding Cheesecake Bars capture the essence of a beloved Southern dessert, bringing you layers of creamy indulgence topped with iconic Nilla Wafers and fresh bananas. Cheesecake bars are perfect for portion control and make an easy yet impressive dessert for gatherings. This unique twist on banana pudding is a must-try for fans of both cheesecake and banana flavors, blending both into a dessert that’s comforting and delightfully simple to prepare.
Ingredients for Creamy Banana Pudding Cheesecake Bars
For this recipe, you’ll need some pantry staples and a few fresh ingredients to create this dessert sensation. Here’s everything you need:
For the Crust:
- 1 1/2 cups crushed Nilla Wafers – Adds the signature vanilla flavor
- 5 tablespoons butter, melted – Helps bind the crust
- 2 tablespoons sugar – Adds a hint of sweetness
- Pinch of sea salt – Enhances flavors
Filling:
- 1 1/2 (8-oz.) blocks cream cheese, softened – Key ingredient for creaminess
- 1/2 cup sugar – Adds sweetness to the cheesecake layer
- 1 1/2 cups whipped topping – Lightens the texture
- 1 (3.4-oz.) package instant banana pudding mix – Brings the banana flavor
- 1 3/4 cups whole milk – Blends with the pudding mix to create a creamy consistency
Topping:
- Whipped topping – Adds a final creamy touch
- 1/2 banana, sliced – Provides a fresh banana flavor
- 9 Nilla Wafers – Adds a nostalgic and decorative touch
How to Make Creamy Banana Pudding Cheesecake Bars – Step by Step
Creating these Creamy Banana Pudding Cheesecake Bars is easy and fun! Follow these step-by-step instructions for a perfect dessert every time.
Step 1: Prepare the Crust
- Crush the Nilla Wafers – You can do this in a food processor or place them in a zip-lock bag and crush them with a rolling pin.
- Combine Ingredients – In a medium bowl, mix the crushed Nilla Wafers with melted butter, sugar, and a pinch of sea salt.
- Press into Pan – Line an 8″ x 8″ pan with parchment paper and press the crust mixture firmly into an even layer at the bottom. Place the pan in the freezer while you prepare the filling to help it set.
2: Make the Cheesecake Filling
- Beat the Cream Cheese – In a large bowl, use a hand or stand mixer to beat the softened cream cheese until fluffy and smooth.
- Add Sugar and Fold in Whipped Topping – Beat in the sugar until combined, then gently fold in the whipped topping, making the mixture lighter.
3: Prepare the Banana Pudding Mix
- Combine Pudding Mix and Milk – In a separate bowl, whisk together the banana pudding mix and milk until thickened. Let it rest in the fridge for about 3 minutes for a smooth, thick consistency.
4: Combine and Assemble
- Fold Pudding into Cheesecake Mixture – Once thickened, gently fold the pudding into the cream cheese mixture until fully incorporated.
- Pour and Smooth the Filling – Pour the filling over the prepared crust and smooth it out to create an even layer.
5: Freeze and Finish
- Freeze the Bars – Place the pan in the freezer for at least 4 hours, or ideally overnight, until the bars are fully set.
- Add Toppings and Slice – Once set, slice into 9 bars. Top each with a dollop of whipped topping, a slice of banana, and a Nilla Wafer for the ultimate finishing touch.
Helpful Tips for Making Creamy Banana Pudding Cheesecake Bars
- Use Softened Cream Cheese – Ensure the cream cheese is at room temperature to avoid lumps.
- Freeze for Perfect Slices – Freezing helps the bars to hold their shape and makes them easier to slice.
- Fold Gently – When folding in the whipped topping and pudding, be gentle to keep the mixture airy and smooth.
Cooking Tips for the Best Creamy Banana Pudding Cheesecake Bars
- Quality Ingredients – Use high-quality Nilla Wafers and fresh bananas for the best flavor.
- Layer Carefully – Smoothing out each layer ensures even distribution and better presentation.
- Sturdy Crust – For a firmer crust, press the mixture down with a flat-bottomed glass.
Serving Suggestions for Creamy Banana Pudding Cheesecake Bars
These bars are delicious on their own but can be paired beautifully with fresh, sliced fruit on the side or a hot cup of coffee. They also work well with a light dusting of cocoa powder or drizzled caramel for added flavor.
Nutritional Information (per serving)
Each bar offers a balance of creaminess and flavor. Here’s the nutritional breakdown:
Nutritional Info for Creamy Banana Pudding Cheesecake Bars:
- Calories: 250 kcal
- Fat: 16g
- Carbohydrates: 23g
- Protein: 4g
Storage and Leftovers for Creamy Banana Pudding Cheesecake Bars
Store any leftover bars in an airtight container in the refrigerator for up to 3 days. For longer storage, keep them in the freezer, where they can last up to 1 month. Allow frozen bars to sit at room temperature for 15 minutes before serving.
Frequently Asked Questions (FAQs) for Creamy Banana Pudding Cheesecake Bars
1. Can I make this recipe gluten-free?
Yes! Substitute gluten-free vanilla wafers for a gluten-free crust.
2. Can I use homemade whipped cream instead of whipped topping?
Absolutely. Just make sure it’s whipped to stiff peaks for the right texture.
3. How do I prevent my bars from becoming too soft?
Ensure they’re frozen for at least 4 hours and keep them chilled until serving.
4. Can I substitute other flavors of pudding?
Of course! Vanilla or even chocolate pudding can offer a different but equally delicious twist.
Related Recipes for Creamy Banana Pudding Cheesecake Bar Lovers
Conclusion
We hope you’ll fall in love with these Creamy Banana Pudding Cheesecake Bars as much as we have! Try them out, share with friends, and feel free to experiment with toppings to make them your own. Don’t forget to leave a comment or share your experience!
Print
Creamy Banana Pudding Cheesecake Bars – Irresistible Treat!
Description
Hey there, cheesecake and banana lovers! 🍌🍰 Welcome to a recipe that brings together two dessert icons into one delightful bite—our Creamy Banana Pudding Cheesecake Bars! These bars are like a hug in dessert form: creamy, dreamy, and packed with the nostalgic taste of banana pudding layered on a cheesecake foundation. Whether you’re a fan of cheesecake, banana pudding, or simply crave a unique twist on classic sweets, this is a treat you won’t want to miss. So, let’s dive into the magic of creating these Banana Pudding Cheesecake Bars that are bound to be a hit for any occasion.
Ingredients
For the Crust:
- 1 1/2 cups crushed Nilla Wafers – Adds the signature vanilla flavor
- 5 tablespoons butter, melted – Helps bind the crust
- 2 tablespoons sugar – Adds a hint of sweetness
- Pinch of sea salt – Enhances flavors
For the Filling:
- 1 1/2 (8-oz.) blocks cream cheese, softened – Key ingredient for creaminess
- 1/2 cup sugar – Adds sweetness to the cheesecake layer
- 1 1/2 cups whipped topping – Lightens the texture
- 1 (3.4-oz.) package instant banana pudding mix – Brings the banana flavor
- 1 3/4 cups whole milk – Blends with the pudding mix to create a creamy consistency
For the Topping:
- Whipped topping – Adds a final creamy touch
- 1/2 banana, sliced – Provides a fresh banana flavor
- 9 Nilla Wafers – Adds a nostalgic and decorative touch
Instructions
Step 1: Prepare the Crust
- Crush the Nilla Wafers – You can do this in a food processor or place them in a zip-lock bag and crush them with a rolling pin.
- Combine Ingredients – In a medium bowl, mix the crushed Nilla Wafers with melted butter, sugar, and a pinch of sea salt.
- Press into Pan – Line an 8″ x 8″ pan with parchment paper and press the crust mixture firmly into an even layer at the bottom. Place the pan in the freezer while you prepare the filling to help it set.
Step 2: Make the Cheesecake Filling
- Beat the Cream Cheese – In a large bowl, use a hand or stand mixer to beat the softened cream cheese until fluffy and smooth.
- Add Sugar and Fold in Whipped Topping – Beat in the sugar until combined, then gently fold in the whipped topping, making the mixture lighter.
Step 3: Prepare the Banana Pudding Mix
- Combine Pudding Mix and Milk – In a separate bowl, whisk together the banana pudding mix and milk until thickened. Let it rest in the fridge for about 3 minutes for a smooth, thick consistency.
Step 4: Combine and Assemble
- Fold Pudding into Cheesecake Mixture – Once thickened, gently fold the pudding into the cream cheese mixture until fully incorporated.
- Pour and Smooth the Filling – Pour the filling over the prepared crust and smooth it out to create an even layer.
Step 5: Freeze and Finish
- Freeze the Bars – Place the pan in the freezer for at least 4 hours, or ideally overnight, until the bars are fully set.
- Add Toppings and Slice – Once set, slice into 9 bars. Top each with a dollop of whipped topping, a slice of banana, and a Nilla Wafer for the ultimate finishing touch.
Equipment
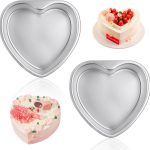
2Pcs Heart Shape Cake Pans, Aluminum Heart Cake Mold, Reusable 10 inch
Buy Now →
Kids Chill Leak-Proof Lunch Box – Included Reusable Ice Pack Keeps Food Cold
Buy Now →Notes
- Use Softened Cream Cheese – Ensure the cream cheese is at room temperature to avoid lumps.
- Freeze for Perfect Slices – Freezing helps the bars to hold their shape and makes them easier to slice.
- Fold Gently – When folding in the whipped topping and pudding, be gentle to keep the mixture airy and smooth.
