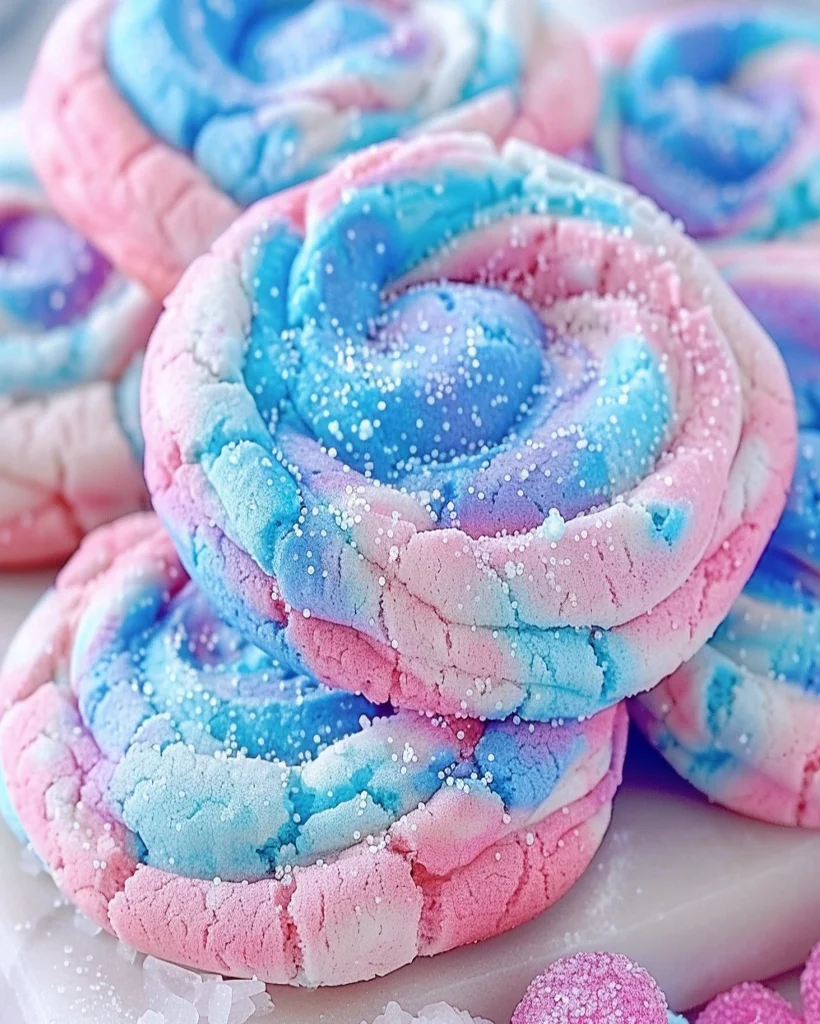
Welcome to a world of sweet nostalgia! If you’re looking to add a touch of magic to your baking, these Cotton Candy Cookies are the perfect treat. Infused with vibrant colors and a hint of sugary sweetness, they capture the essence of cotton candy in a chewy, melt-in-your-mouth cookie. Whether you’re planning a party or just want to indulge in something whimsical, these cookies are bound to bring smiles and spark joy!
Introduction
The combination of cotton candy and cookies creates a unique, colorful dessert that is as fun to make as it is to eat. These cookies are a delightful twist on classic sugar cookies, inspired by the light, airy texture of cotton candy. The pretty pastel hues of pink and blue swirled together make them ideal for special occasions, birthdays, or whenever you want to serve a sweet, cheerful dessert. Whether you’re a fan of carnival treats or just love playful, creative desserts, these Cotton Candy Cookies are a must-try!
Ingredients for Cotton Candy Cookies
To create these whimsical cookies, you’ll need the following ingredients:
- 2 1/2 cups all-purpose flour
- 1 cup granulated sugar
- 1/2 teaspoon baking powder
- 1/4 teaspoon baking soda
- 1/4 teaspoon salt
- 1/2 cup unsalted butter (softened)
- 1/4 cup buttermilk (you can substitute with 1/4 cup milk mixed with 1 teaspoon lemon juice or vinegar if you don’t have buttermilk)
- 1 large egg
- 1 teaspoon vanilla extract
- Gel food coloring (pink and blue)
- Cotton candy flavoring (optional, for an added burst of that nostalgic cotton candy flavor)
Feel free to swap the buttermilk with any plant-based milk if you’re making a dairy-free version. For a gluten-free option, substitute the all-purpose flour with a gluten-free flour blend.
How to Make Cotton Candy Cookies – Step by Step
Making these cookies is a fun, hands-on experience. Follow these simple steps to create a batch of soft, chewy Cotton Candy Cookies that will wow your friends and family.
Step 1: Preheat the Oven
Preheat your oven to 350°F (175°C). Prepare a baking sheet by lining it with parchment paper to prevent the cookies from sticking and ensure even baking.
Step 2: Mix the Dry Ingredients
In a medium-sized bowl, combine flour, baking powder, baking soda, and salt. Whisk them together to evenly distribute the leavening agents and salt through the flour.
Step 3: Cream Butter and Sugar
In a separate large bowl, use an electric mixer to beat softened butter and sugar until the mixture is light and fluffy. This will take about 2-3 minutes and is crucial for giving your cookies the perfect texture.
Step 4: Add the Wet Ingredients
Next, add the egg, vanilla extract, and buttermilk to the butter-sugar mixture. Beat until the mixture is smooth and creamy.
Step 5: Combine Dry and Wet Ingredients
Gradually add the dry ingredient mixture to the wet ingredients. Mix just until combined, being careful not to overmix, as this can make the cookies tough.
Step 6: Divide and Color the Dough
Split the dough into two equal parts. In one bowl, add a few drops of pink gel food coloring, and in the other, add blue gel food coloring. Mix each portion of dough until the colors are evenly distributed.
Step 7: Form the Cotton Candy Cookies
Take a small amount of pink dough and a small amount of blue dough, roll them together into a ball, and gently swirl them to create a cotton candy effect. Place the cookie balls on the prepared baking sheet, leaving about 2 inches of space between each cookie to allow them to spread as they bake.
Step 8: Bake
Bake the cookies for 10-12 minutes, or until the edges are lightly golden. Keep an eye on them, as you don’t want to overbake these delicate cookies.
Step 9: Cool and Serve
Let the cookies cool on the baking sheet for a few minutes before transferring them to a wire rack to cool completely. Once cooled, serve and enjoy these delightful treats!
Helpful Tips for Cotton Candy Cookies
To make the perfect batch of Cotton Candy Cookies, follow these helpful tips:
- Use gel food coloring: Gel coloring provides more vibrant shades than liquid food coloring and won’t alter the dough’s texture.
- Chill the dough: If your dough is too soft to handle, chilling it in the fridge for 20-30 minutes will make it easier to work with.
- Swirl, don’t mix: When combining the pink and blue doughs, gently swirl them to create a fun cotton candy look. Avoid overmixing, which will blend the colors too much.
Cooking Tips for the Best Cotton Candy Cookies
If you want to elevate your Cotton Candy Cookie game, try these cooking techniques:
- Use high-quality butter for a richer flavor. Unsalted butter allows you to control the salt levels better.
- Add cotton candy flavoring for that extra boost of nostalgic flavor. This is optional but highly recommended if you’re looking to replicate the taste of cotton candy.
- Sift the flour to ensure a lighter, fluffier cookie texture.
Serving Suggestions for Cotton Candy Cookies
These cookies are a visual and flavorful treat on their own, but here are a few ways to serve them:
- Pair with a scoop of vanilla ice cream for an extra indulgent dessert.
- Serve with warm milk or a glass of pink lemonade for a fun, carnival-inspired treat.
- Use them as part of a dessert table at a birthday party or baby shower, where the vibrant colors will stand out.
The pastel colors of these cookies make them perfect for any festive occasion, and they’ll be a hit at any gathering!
Nutritional Information
These Cotton Candy Cookies are not just fun to eat, they also have a reasonable nutritional profile, making them a treat you can enjoy in moderation.
Nutritional Information (per serving):
- Calories: 180 kcal
- Total Fat: 8g
- Saturated Fat: 5g
- Cholesterol: 35mg
- Sodium: 80mg
- Total Carbohydrates: 25g
- Dietary Fiber: 0.5g
- Sugars: 15g
- Protein: 2g
Storage and Leftovers for Cotton Candy Cookies
If you have leftover Cotton Candy Cookies (though we doubt you will!), here’s how to keep them fresh:
- Room Temperature: Store the cookies in an airtight container at room temperature for up to 5 days. They’ll stay soft and chewy if sealed properly.
- Freezing: You can freeze the cookie dough balls before baking. Place them on a tray to freeze individually, then transfer them to a ziplock bag. When you’re ready to bake, simply bake from frozen, adding an extra 2-3 minutes to the baking time.
- Reheating: To enjoy them warm, pop the cookies in the microwave for 10-15 seconds, and they’ll taste freshly baked!
4 Frequently Asked Questions (FAQs) for Cotton Candy Cookies
Q1: Can I use liquid food coloring instead of gel?
A1: While you can use liquid food coloring, gel food coloring is preferred for its intensity and because it won’t affect the dough’s consistency as much.
Q2: What if I don’t have buttermilk?
A2: No problem! You can make a homemade buttermilk substitute by mixing 1/4 cup of milk with 1 teaspoon of lemon juice or vinegar. Let it sit for a few minutes before using.
Q3: How can I make these cookies vegan?
A3: Substitute the butter with vegan margarine, the egg with a flaxseed or chia egg, and the buttermilk with a non-dairy milk (like almond or soy milk) mixed with a bit of lemon juice.
Q4: Can I add sprinkles or other decorations?
A4: Absolutely! Adding sprinkles or edible glitter can make these cookies even more fun and festive.
Related Recipes for Cotton Candy Cookie Lovers
Here are two related recipes that you might enjoy if you loved these Cotton Candy Cookies:
- Unicorn Sugar Cookies – These vibrant sugar cookies are just as colorful and sweet, with a dash of magic.
- Funfetti Cake Mix Cookies – Easy-to-make and full of rainbow sprinkles, these cookies are perfect for a party or quick treat.
Conclusion
There’s no better way to add a pop of color and sweetness to your day than with Cotton Candy Cookies. These chewy, colorful cookies are not only a treat for the taste buds but also for the eyes! With their light texture and nostalgic flavor, they’re bound to become a favorite at parties, bake sales, or as a fun weekend baking project.
Give them a try, and don’t forget to let us know how they turned out! We’d love to hear if you added your own unique twist or variation to the recipe.
Print
Cotton Candy Cookies Recipe – Fun & Colorful Treats
Description
Welcome to a world of sweet nostalgia! If you’re looking to add a touch of magic to your baking, these Cotton Candy Cookies are the perfect treat. Infused with vibrant colors and a hint of sugary sweetness, they capture the essence of cotton candy in a chewy, melt-in-your-mouth cookie. Whether you’re planning a party or just want to indulge in something whimsical, these cookies are bound to bring smiles and spark joy!
Ingredients
- 2 1/2 cups all-purpose flour
- 1 cup granulated sugar
- 1/2 teaspoon baking powder
- 1/4 teaspoon baking soda
- 1/4 teaspoon salt
- 1/2 cup unsalted butter (softened)
- 1/4 cup buttermilk (you can substitute with 1/4 cup milk mixed with 1 teaspoon lemon juice or vinegar if you don’t have buttermilk)
- 1 large egg
- 1 teaspoon vanilla extract
- Gel food coloring (pink and blue)
- Cotton candy flavoring (optional, for an added burst of that nostalgic cotton candy flavor)
Feel free to swap the buttermilk with any plant-based milk if you’re making a dairy-free version. For a gluten-free option, substitute the all-purpose flour with a gluten-free flour blend.
Instructions
Step 1: Preheat the Oven
Preheat your oven to 350°F (175°C). Prepare a baking sheet by lining it with parchment paper to prevent the cookies from sticking and ensure even baking.
Step 2: Mix the Dry Ingredients
In a medium-sized bowl, combine flour, baking powder, baking soda, and salt. Whisk them together to evenly distribute the leavening agents and salt through the flour.
Step 3: Cream Butter and Sugar
In a separate large bowl, use an electric mixer to beat softened butter and sugar until the mixture is light and fluffy. This will take about 2-3 minutes and is crucial for giving your cookies the perfect texture.
Step 4: Add the Wet Ingredients
Next, add the egg, vanilla extract, and buttermilk to the butter-sugar mixture. Beat until the mixture is smooth and creamy.
Step 5: Combine Dry and Wet Ingredients
Gradually add the dry ingredient mixture to the wet ingredients. Mix just until combined, being careful not to overmix, as this can make the cookies tough.
Step 6: Divide and Color the Dough
Split the dough into two equal parts. In one bowl, add a few drops of pink gel food coloring, and in the other, add blue gel food coloring. Mix each portion of dough until the colors are evenly distributed.
Step 7: Form the Cotton Candy Cookies
Take a small amount of pink dough and a small amount of blue dough, roll them together into a ball, and gently swirl them to create a cotton candy effect. Place the cookie balls on the prepared baking sheet, leaving about 2 inches of space between each cookie to allow them to spread as they bake.
Step 8: Bake
Bake the cookies for 10-12 minutes, or until the edges are lightly golden. Keep an eye on them, as you don’t want to overbake these delicate cookies.
Step 9: Cool and Serve
Let the cookies cool on the baking sheet for a few minutes before transferring them to a wire rack to cool completely. Once cooled, serve and enjoy these delightful treats!
Equipment

2Pcs Heart Shape Cake Pans, Aluminum Heart Cake Mold, Reusable 10 inch
Buy Now →
Kids Chill Leak-Proof Lunch Box – Included Reusable Ice Pack Keeps Food Cold
Buy Now →Notes
- Use gel food coloring: Gel coloring provides more vibrant shades than liquid food coloring and won’t alter the dough’s texture.
- Chill the dough: If your dough is too soft to handle, chilling it in the fridge for 20-30 minutes will make it easier to work with.
- Swirl, don’t mix: When combining the pink and blue doughs, gently swirl them to create a fun cotton candy look. Avoid overmixing, which will blend the colors too much.
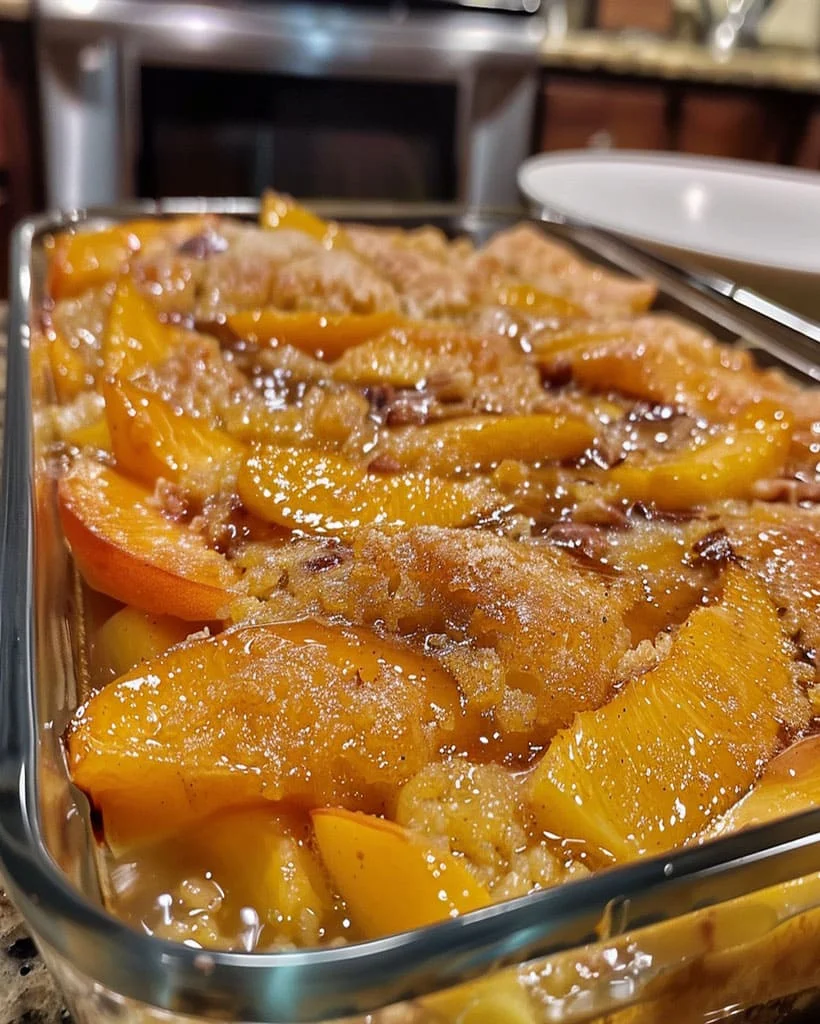






Festive, chocolatey, and irresistibly chewy—pure holiday magic! 🎄🍪✨
★★★★★