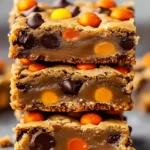
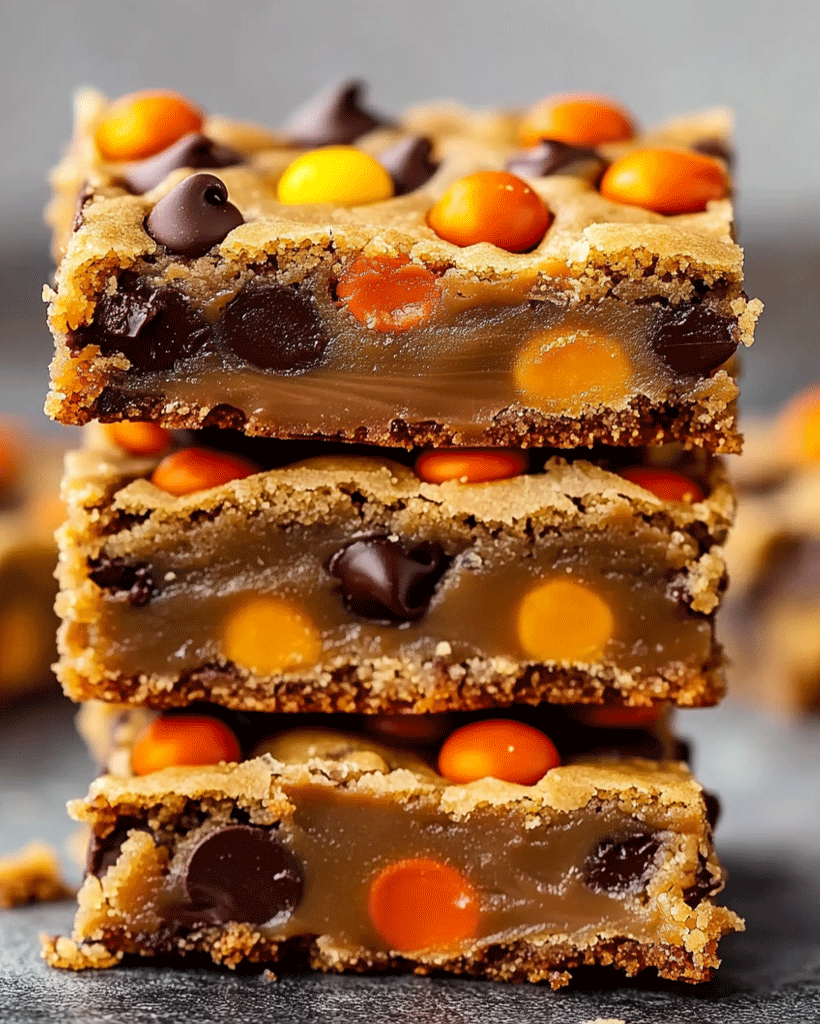
Welcome, dessert lovers! If you’re a fan of chewy, gooey bars packed with peanut butter and chocolate, you’re in for a treat with these Chewy Peanut Butter Chocolate Candy Bars! This recipe is everything you love about classic peanut butter desserts, combined with a delightful chocolate twist. These chewy, decadent bars are the perfect comfort food to share with friends, family, or simply enjoy on your own. Grab your apron, and let’s dive into this must-try recipe that’s bound to be your new favorite!
Introduction
When it comes to satisfying a sweet craving, few treats deliver as perfectly as these Chewy Peanut Butter Chocolate Candy Bars. This classic recipe draws inspiration from old-fashioned peanut butter bars but with a fun, modern twist of candy-coated chocolates for a burst of color and crunch. Whether you’re baking for a party, holiday gathering, or simply treating yourself, these bars are perfect for any occasion. With a chewy texture, a peanut butter richness, and chocolatey goodness, these bars are the ultimate comfort dessert, ideal for fans of both peanut butter cookies and chocolate-lovers alike.
Ingredients for Chewy Peanut Butter Chocolate Candy Bars
For this recipe, you’ll need a mix of pantry staples and a few special ingredients to create the ultimate chewy texture and rich flavor. Here’s what you’ll need:
- 1 cup unsalted butter, melted
- 1 cup brown sugar, packed
- 1/2 cup granulated sugar
- 1 cup creamy peanut butter
- 2 large eggs
- 2 tsp vanilla extract
- 2 cups all-purpose flour
- 1 tsp baking powder
- 1/2 tsp baking soda
- 1/4 tsp salt
- 1 cup chocolate chips
- 1 cup colorful candy-coated chocolates (like Reese’s Pieces or M&Ms)
Optional Substitutions:
- Swap creamy peanut butter for a chunky variety for added texture.
- For a dairy-free option, use plant-based butter and ensure chocolate chips are dairy-free.
How to Make Chewy Peanut Butter Chocolate Candy Bars – Step by Step
Follow these steps to create your perfect batch of Chewy Peanut Butter Chocolate Candy Bars:
Step 1: Prep Your Oven and Pan
Preheat your oven to 350°F (175°C) and line a 9×13-inch baking pan with parchment paper, leaving an overhang on each side. This makes it easy to lift the bars out after baking.
Step 2: Combine Wet Ingredients
In a large bowl, whisk together the melted butter, brown sugar, and granulated sugar until smooth and fully combined. Add the peanut butter, eggs, and vanilla extract, mixing well until you have a creamy, blended consistency.
Step 3: Mix Dry Ingredients
In a separate bowl, whisk together the flour, baking powder, baking soda, and salt. Gradually add the dry ingredients to the wet ingredients, stirring gently to avoid over-mixing.
Step 4: Add Chocolate Chips and Candy
Fold in the chocolate chips and most of the candy-coated chocolates, reserving a small handful for topping.
Step 5: Spread and Bake
Spread the batter evenly into your prepared baking pan. Sprinkle the reserved candy-coated chocolates on top for a colorful finish. Bake for 25-30 minutes or until the edges are golden and a toothpick inserted in the center comes out with a few moist crumbs.
Step 6: Cool and Slice
Allow the bars to cool completely in the pan on a wire rack before lifting them out. Slice into squares and enjoy!
Helpful Tips for Chewy Peanut Butter Chocolate Candy Bars
- Use Room Temperature Ingredients: Ensures even mixing and a smooth texture.
- Don’t Over-Mix the Batter: Over-mixing can lead to tough bars; mix just until ingredients are combined.
- Customize Your Candies: Swap in any of your favorite candy-coated chocolates or even mini peanut butter cups for added flair.
- Chill for Cleaner Slices: Refrigerating the bars for 10-15 minutes before slicing can help you achieve neat, clean cuts.
Cooking Tips for the Best Chewy Peanut Butter Chocolate Candy Bars
- Opt for Fresh Ingredients: Fresh baking powder and baking soda ensure optimal lift and a soft texture.
- Baking Pan Size Matters: Stick to a 9×13-inch pan; using a smaller or larger pan may affect baking time and texture.
- Try Different Toppings: Sprinkle sea salt on top before baking for a salted caramel-like flavor or drizzle melted chocolate over the cooled bars for an extra chocolatey treat.
Serving Suggestions for Chewy Peanut Butter Chocolate Candy Bars
Serve these Chewy Peanut Butter Chocolate Candy Bars with a cold glass of milk, hot cocoa, or even a scoop of vanilla ice cream. They’re also great alongside coffee for an afternoon treat. These bars are a perfect addition to a dessert table, holiday platter, or gift box, making them as versatile as they are delicious.
Nutritional Information
Enjoy these delicious bars in moderation! While they’re rich in flavor, they’re also a satisfying treat that can be enjoyed as part of a balanced diet.
Nutritional Information (Per Serving)
Each serving (1 bar, assuming 24 bars per batch) contains:
- Calories: 220
- Fat: 13g
- Carbohydrates: 26g
- Protein: 4g
- Fiber: 1g
- Sugars: 18g
Note: Nutritional values are approximate and may vary based on ingredient brands and measurements.
Storage and Leftovers for Chewy Peanut Butter Chocolate Candy Bars
- At Room Temperature: Store bars in an airtight container for up to 5 days.
- In the Refrigerator: For extended freshness, refrigerate the bars in an airtight container for up to 1 week.
- In the Freezer: Wrap bars individually in plastic wrap and place them in a freezer-safe bag or container. They can be frozen for up to 2 months. Thaw at room temperature before serving.
To reheat, microwave for 10-15 seconds to bring back a bit of the gooey texture.
Frequently Asked Questions (FAQs) for Chewy Peanut Butter Chocolate Candy Bars
- Can I make these bars gluten-free? Yes, substitute all-purpose flour with a gluten-free flour blend.
- What other mix-ins can I add? Try adding chopped nuts, white chocolate chips, or even pretzels for a salty-sweet twist.
- Can I reduce the sugar in this recipe? You can reduce the granulated sugar by up to 1/4 cup for a less sweet bar.
- Can I make these bars vegan? Substitute eggs with flaxseed meal (1 tbsp ground flaxseed + 3 tbsp water = 1 egg) and use vegan butter and dairy-free chocolate chips.
Related Recipes for Chewy Peanut Butter Chocolate Candy Bar Lovers
Conclusion
These Chewy Peanut Butter Chocolate Candy Bars are the ultimate dessert for peanut butter and chocolate fans alike! Their chewy texture, rich flavor, and colorful candy topping make them a must-try treat. We hope you enjoy baking (and eating!) these as much as we do. Don’t forget to share your experience in the comments below, and feel free to try out your own variations—whether it’s adding a drizzle of chocolate or swapping in different candy toppings. Happy baking!
Print
Chewy Peanut Butter Chocolate Candy Bars
Description
Welcome, dessert lovers! If you’re a fan of chewy, gooey bars packed with peanut butter and chocolate, you’re in for a treat with these Chewy Peanut Butter Chocolate Candy Bars! This recipe is everything you love about classic peanut butter desserts, combined with a delightful chocolate twist. These chewy, decadent bars are the perfect comfort food to share with friends, family, or simply enjoy on your own. Grab your apron, and let’s dive into this must-try recipe that’s bound to be your new favorite!
Ingredients
- 1 cup unsalted butter, melted
- 1 cup brown sugar, packed
- 1/2 cup granulated sugar
- 1 cup creamy peanut butter
- 2 large eggs
- 2 tsp vanilla extract
- 2 cups all-purpose flour
- 1 tsp baking powder
- 1/2 tsp baking soda
- 1/4 tsp salt
- 1 cup chocolate chips
- 1 cup colorful candy-coated chocolates (like Reese’s Pieces or M&Ms)
Optional Substitutions:
- Swap creamy peanut butter for a chunky variety for added texture.
- For a dairy-free option, use plant-based butter and ensure chocolate chips are dairy-free.
Instructions
Step 1: Prep Your Oven and Pan
Preheat your oven to 350°F (175°C) and line a 9×13-inch baking pan with parchment paper, leaving an overhang on each side. This makes it easy to lift the bars out after baking.
Step 2: Combine Wet Ingredients
In a large bowl, whisk together the melted butter, brown sugar, and granulated sugar until smooth and fully combined. Add the peanut butter, eggs, and vanilla extract, mixing well until you have a creamy, blended consistency.
Step 3: Mix Dry Ingredients
In a separate bowl, whisk together the flour, baking powder, baking soda, and salt. Gradually add the dry ingredients to the wet ingredients, stirring gently to avoid over-mixing.
Step 4: Add Chocolate Chips and Candy
Fold in the chocolate chips and most of the candy-coated chocolates, reserving a small handful for topping.
Step 5: Spread and Bake
Spread the batter evenly into your prepared baking pan. Sprinkle the reserved candy-coated chocolates on top for a colorful finish. Bake for 25-30 minutes or until the edges are golden and a toothpick inserted in the center comes out with a few moist crumbs.
Step 6: Cool and Slice
Allow the bars to cool completely in the pan on a wire rack before lifting them out. Slice into squares and enjoy!
Equipment

2Pcs Heart Shape Cake Pans, Aluminum Heart Cake Mold, Reusable 10 inch
Buy Now →
Kids Chill Leak-Proof Lunch Box – Included Reusable Ice Pack Keeps Food Cold
Buy Now →Notes
- Use Room Temperature Ingredients: Ensures even mixing and a smooth texture.
- Don’t Over-Mix the Batter: Over-mixing can lead to tough bars; mix just until ingredients are combined.
- Customize Your Candies: Swap in any of your favorite candy-coated chocolates or even mini peanut butter cups for added flair.
- Chill for Cleaner Slices: Refrigerating the bars for 10-15 minutes before slicing can help you achieve neat, clean cuts.


