Description
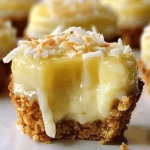
Welcome, dessert enthusiasts! Today, we’re diving into a refreshing and creamy delight that’s perfect for any occasion—No-Bake Lemon Coconut Mini Pie. Whether you’re craving a quick, easy-to-make treat or looking for something light and tangy, these mini pies are sure to satisfy. Plus, the combination of zesty lemon and toasted coconut brings a tropical twist to every bite! Let’s get started on crafting this Luscious Lemon Coconut Delight!
Ingredients
- 1 cup graham cracker crumbs
(Crushed into fine crumbs for the base crust) - 4 tbsp melted butter
(Helps bind the graham cracker crumbs) - 1 can (14 oz) sweetened condensed milk
(Gives the filling a smooth, rich texture) - 1/2 cup fresh lemon juice
(The star ingredient that provides a tangy punch) - Zest of 1 lemon
(Adds a burst of fresh citrus flavor) - 1/2 cup shredded coconut
(Toasted for garnish; optional) - 1/2 cup heavy whipping cream (optional, for topping)
(Perfect for adding a creamy, decadent finish)
Optional Ingredient Substitutions:
- Gluten-free graham crackers for a gluten-free option.
- Coconut milk can be used in place of heavy whipping cream for a dairy-free alternative.
- Sugar-free sweetened condensed milk for a lighter, diabetic-friendly version.
Instructions
Step 1: Prepare the Crust
In a medium-sized mixing bowl, combine 1 cup of graham cracker crumbs with 4 tablespoons of melted butter. Stir until the mixture resembles wet sand. Evenly press the crumb mixture into the bottoms of mini pie molds or muffin liners to form the crust. Use a spoon or the bottom of a glass to compact the crust for a firm base.
Step 2: Make the Lemon Filling
In another bowl, whisk together 1 can of sweetened condensed milk, 1/2 cup fresh lemon juice, and the zest of 1 lemon. Whisk until smooth and creamy. The acidity of the lemon will thicken the condensed milk, creating a rich, tangy filling.
Step 3: Fill the Pies
Pour the lemon filling evenly over the prepared crusts in the mini molds. Be sure to fill each one to the top, allowing the creamy mixture to settle. Smooth out the tops with a spoon for an even finish.
Step 4: Chill to Set
Place the mini pies in the refrigerator for at least 2 hours to allow the filling to set. For best results, refrigerate them overnight.
Step 5: Garnish and Serve
Before serving, sprinkle the tops with toasted shredded coconut and add a dollop of whipped cream for a touch of indulgence. Enjoy these refreshing mini pies chilled!
Equipment

2Pcs Heart Shape Cake Pans, Aluminum Heart Cake Mold, Reusable 10 inch
Buy Now →
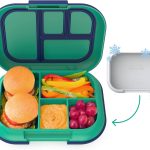
Kids Chill Leak-Proof Lunch Box – Included Reusable Ice Pack Keeps Food Cold
Buy Now →Notes
- Use Fresh Lemon Juice: For the best flavor, always use freshly squeezed lemon juice. Bottled juice won’t provide the same fresh, tangy taste.
- Chill Properly: Make sure to chill the pies for at least 2 hours, but overnight chilling will result in a firmer, creamier pie.
- Press the Crust Firmly: To prevent a crumbly crust, press the graham cracker mixture down firmly in the molds. This will help it hold together when serving.
- Customize the Garnish: If you’re feeling creative, try garnishing the pies with lemon slices, berries, or even a drizzle of lemon curd.
