
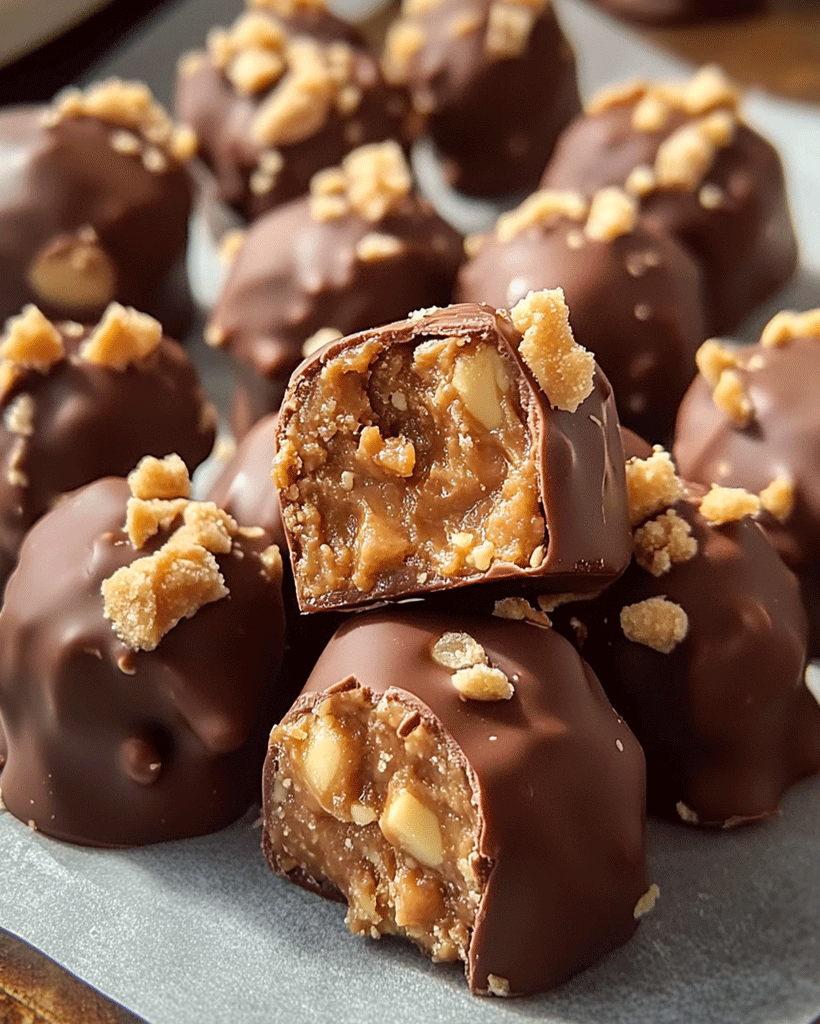
Enjoy this delicious recipe to make no-bake Butterfinger Candy Balls! If you’re looking for tasty, quick and delicious treats, then you’ve come to the right spot. These bite-sized snacks blend the delicious flavors that are the hallmarks of Butterfinger candy with smooth peanut butter and a silky chocolate coating. They’re great for holidays, parties or as a treat to enjoy anytime!
Introduction
No-Bake Butterfinger Candy Balls are a game-changer for dessert lovers. Combining the nostalgic flavor and nostalgia Butterfinger chocolate bars and the convenience of a recipe that doesn’t require baking, these candy balls are as enjoyable to prepare as they are to enjoy. With only a few ingredients as well as no oven needed this recipe is ideal to anyone who is seeking a simple way to indulge in their sweet cravings.
Ingredients for No-Bake Butterfinger Candy Balls
Here’s the ingredients you’ll need to make these delicious desserts:
- 2 cups crushed Butterfinger candy bars
- 1 Cup of crushed Graham crackers
- 1 cup of creamy peanut butter
- 1 Cup powdered sugar
- 1 cup semi-sweet chocolate chips
- 1 tablespoon coconut oil
Alternate substitutions for HTML0:
- Switch peanut butter with almond butter to give it a delicious twist.
- Make use of gluten-free graham crackers in order in the dish to ensure that it is not gluten-free.
How to Make No-Bake Butterfinger Candy Balls – Step by Step
Step1: Combine Ingredients
In an enormous mixing bowl, mix with the crushed Butterfinger chocolate bars with graham crackers peanut butter as well as powdered sugar. Mix until the ingredients are completely blended.
Step2: Form the Balls
Utilizing the small scoop or teaspoon, divide the mixture, then make it into small balls. Place the balls on a parchment-lined baking sheet.
Step3: Freeze
Place the baking sheet in the freezer for around 30 minutes. This will ensure that the balls stay in shape when dipping.
Step4: Melt the Chocolate
Within a bowl that is microwave safe mix the chocolate chips with coconut oil. In 20 second intervals, heat and stirring between each interval, until chocolate becomes smooth and melts.
Step5: Coat the Balls
With a fork or skewer to dip each ball in the chocolate, making sure it’s completely coated. Return the coated balls on the baking sheet lined with parchment.
Step6: Set the Chocolate
Let the chocolate be set at room temperature or refrigerate it for 15 minutes or until it is the chocolate is firm.
Helpful Tips for No-Bake Butterfinger Candy Balls
- Consistency is Important: If the mixture is too sticky, include more crushed Graham crackers.
- Ideal Dipping Utilize a fork to make dipping easy and gently tap to take out any chocolate.
- Storage Store the balls inside an airtight jar in the fridge to ensure freshness.
Cooking Tips for the Best No-Bake Butterfinger Candy Balls
- Crush Effectively: Use a food processor to crush quickly the Butterfinger bars and Graham crackers.
- Temperature is a Factor: Ensure the balls are chilled well prior to dipping them in order to ensure they don’t melt in the chocolate.
Serving Suggestions for No-Bake Butterfinger Candy Balls
- Serve these with hot hot chocolate or coffee to make an indulgence that is cozy.
- Set them out on a plate with fresh fruits to create an elegant dessert buffet.
Nutritional Information
Nutritional info for No-Bake Butterfinger Candy Balls (per serving):
- Calories: 120 kcal
- Fat: 7 g
- Carbs: 14 g
- Protein: 2 g
Storage and Leftovers for No-Bake Butterfinger Candy Balls
- Storage Put in an air-tight container and store in the refrigerator for up to a week.
- Reheating They are most delicious consumed chilled. If they’re frozen allow them to sit in room temperatures for five minutes prior to serving.
Frequently Asked Questions (FAQs) for No-Bake Butterfinger Candy Balls
1. Can I use a different candy bar?
Absolutely! Consider Snickers, Reese’s, or Milky Way to get a new flavor.
2. How can prepare this dish Nut-free?
Make use of the sunflower seeds instead of peanut butter, and stay clear of any candy bars containing nuts.
3. Can I freeze these sweets?
Yes, you can store them within a safe container for freezing at least 3 months.
4. What’s the best method for crushing Butterfinger bars?
A zip-top bag as well as a rolling pin can be useful even if you don’t own an food processor.
Related Recipes for Candy Lovers
Conclusion
Here’s the recipeThere you have it- Butterfinger candy balls that are not baked that are as simple making as they are delicious to eat. Ideal for any occasion, these sweets are guaranteed to please. Be sure to share your recipes and share with us what you did to personalize the recipe. Happy no-baking!
Print
No-Bake Butterfinger Balls Recipe | Easy Dessert
Description
Hello, dessert enthusiasts! Are you ready to whip up an easy and delightful treat without even turning on your oven? Today, we’re diving into the irresistible world of No-Bake Butterfinger Balls. This recipe is a perfect combination of creamy, crunchy, and chocolaty goodness. Whether you’re looking for a quick dessert or a fun family activity, these butterfinger candy balls are sure to become a favorite in your household.
Ingredients
- 2 cups crushed Butterfinger candy bars
- 1 cup crushed graham crackers
- 1 cup creamy peanut butter
- 1 cup powdered sugar
- 1 cup semi-sweet chocolate chips
- 1 teaspoon coconut oil
Optional Substitutions:
- Replace graham crackers with crushed digestive biscuits for a different texture.
- Use almond or sunflower butter for a nut-free alternative.
- Swap semi-sweet chocolate chips with milk or dark chocolate according to your preference.
Instructions
Step 1: Mix the Base
In a large bowl, combine the crushed Butterfinger candy bars, crushed graham crackers, peanut butter, and powdered sugar. Mix thoroughly until the ingredients are well blended.
Step 2: Shape the Balls
Scoop small portions of the mixture using a teaspoon or small scoop. Roll into bite-sized balls and place them on a parchment-lined baking sheet.
Step 3: Freeze the Balls
Freeze the balls for about 30 minutes. This helps them firm up and makes coating easier.
Step 4: Melt the Chocolate
Melt the chocolate chips and coconut oil in a microwave-safe bowl. Heat in 20-second intervals, stirring until smooth.
Step 5: Coat the Balls
Dip each ball into the melted chocolate using a fork or skewer, ensuring an even coating. Place the coated balls back onto the parchment-lined baking sheet.
Step 6: Set the Coating
Let the chocolate set at room temperature or refrigerate for 15 minutes until firm.
Equipment

2Pcs Heart Shape Cake Pans, Aluminum Heart Cake Mold, Reusable 10 inch
Buy Now →
Kids Chill Leak-Proof Lunch Box – Included Reusable Ice Pack Keeps Food Cold
Buy Now →Notes
- Chill the peanut butter mixture slightly if it feels too sticky to work with.
- Use parchment or wax paper to avoid the balls sticking to the tray.
- For an extra crunch, add finely chopped peanuts to the mixture.
