Description
Hello, dessert lovers! If you’re craving a treat that’s indulgent, yet easy to prepare, you’re in for a treat. Today, we’re diving into the world of Chocolate Cherry Cheesecake Truffles. These decadent, chocolate-covered cherry cheesecake bites combine creamy, tangy cheesecake with the sweetness of cherries and the richness of chocolate. Perfect for gatherings, or simply for when you’re craving something sweet, this recipe is one you’ll want to keep on hand.
Ingredients
- 1 cup cream cheese, softened
- 1/2 cup powdered sugar
- 1/2 teaspoon vanilla extract
- 1/2 cup dried cherries, chopped (or fresh if preferred)
- 1/4 cup crushed graham crackers (optional for added texture)
- 1 cup semi-sweet chocolate chips
- 1 tablespoon coconut oil
These ingredients form the base of the truffle filling and the delicious chocolate coating. For those with dietary restrictions, you can swap out the cream cheese for a dairy-free alternative or use a gluten-free graham cracker option. Let’s move on to the next step to create these mouthwatering delights!
Instructions
Step 1: Prepare the Cheesecake Filling
In a medium-sized mixing bowl, combine softened cream cheese, powdered sugar, and vanilla extract. Beat the mixture until it’s smooth and creamy. This will form the delicious, rich cheesecake base.
Step 2: Add Cherries and Graham Crackers
Next, gently fold in the dried cherries and crushed graham crackers. These ingredients add both flavor and texture to the cheesecake filling, giving it that classic cheesecake crust experience, but in truffle form.
Step 3: Form the Truffles
Use a small cookie scoop or spoon to portion out the mixture. Roll the portions into small balls, approximately 1 tablespoon each. Place them on a parchment-lined tray and freeze for at least 30 minutes, or until they’re firm enough to handle.
Step 4: Prepare the Chocolate Coating
While the truffles freeze, melt the semi-sweet chocolate chips and coconut oil together in a microwave-safe bowl. Microwave in 30-second intervals, stirring each time until completely melted and smooth.
Step 5: Coat the Truffles
Once the truffles are firm, dip each one into the melted chocolate, ensuring it’s fully coated. Place the chocolate-covered truffles back onto the parchment-lined tray.
Step 6: Set and Serve
For an extra touch, garnish the truffles with a drizzle of melted white chocolate or a sprinkle of crushed graham crackers. Chill the coated truffles in the refrigerator for at least an hour to set before serving.
Equipment

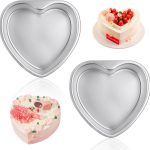
2Pcs Heart Shape Cake Pans, Aluminum Heart Cake Mold, Reusable 10 inch
Buy Now →
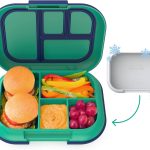
Kids Chill Leak-Proof Lunch Box – Included Reusable Ice Pack Keeps Food Cold
Buy Now →Notes
- Use room temperature cream cheese: It will blend more easily and make the truffle filling smoother.
- Chill the truffles properly: Freezing the filling balls before coating them in chocolate helps prevent the truffles from losing their shape when dipped.
- Consider using a high-quality chocolate: The chocolate coating plays a huge role in the final flavor of the truffles, so use your favorite chocolate for the best results.
