
Hello, food enthusiasts! If you’re a fan of Japanese cuisine or simply crave a dish that’s both crispy and savory, you’re in for a treat today with our Chicken Katsu Curry recipe. This dish is a perfect blend of textures and flavors, with crunchy chicken katsu smothered in a creamy curry sauce. Whether you’ve tried it at your favorite Japanese restaurant or are experiencing it for the first time, this recipe will bring the authentic taste of Chicken Katsu Curry straight to your home!
Introduction
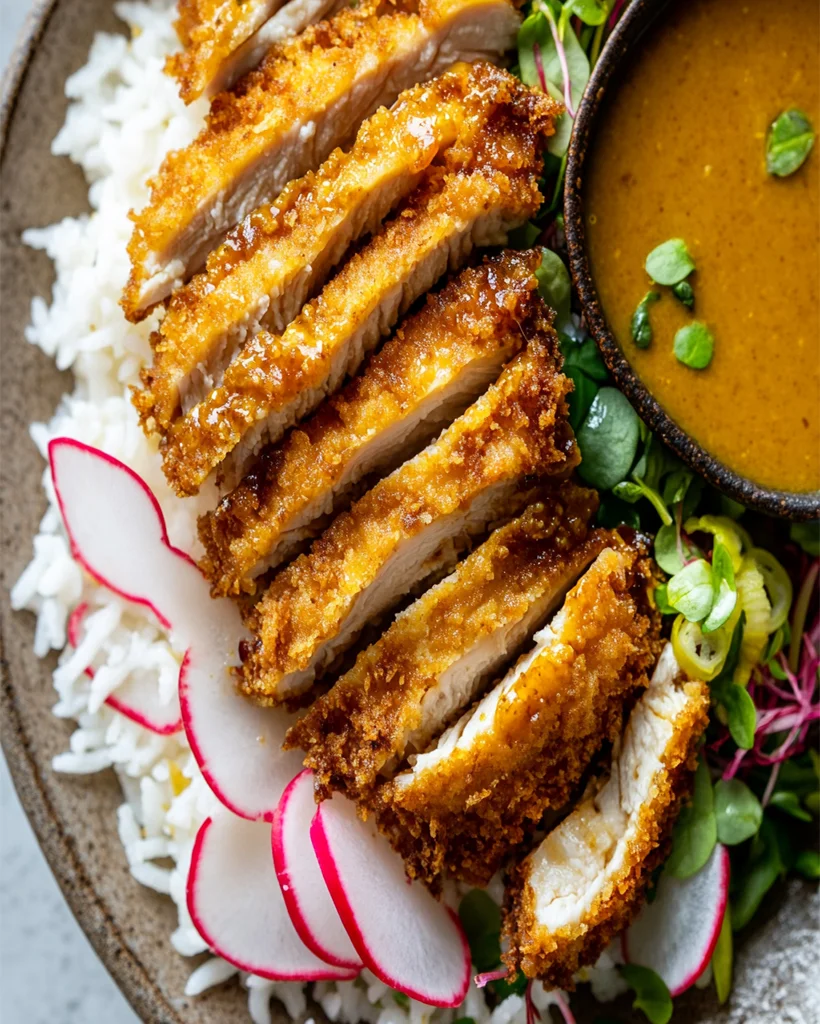
Chicken Katsu Curry is a beloved dish from Japanese cuisine that has gained international fame for its delectable contrast of flavors. Originating from Japan’s fusion of Western and Japanese cooking styles, this dish features a crispy, breaded chicken cutlet served with a savory, mildly spicy curry sauce. It’s a dish perfect for fans of both comfort food and Japanese delicacies, offering a unique twist on traditional fried chicken. Best of all, it’s surprisingly easy to make at home with just a few key ingredients and an air fryer!
Be sure to check out these savory casserole recipes for more comfort food inspiration!
Ingredients for Chicken Katsu Curry
Here’s everything you’ll need to create this mouthwatering Chicken Katsu Curry dish:
For the Curry Sauce:
- 2 tbsp vegetable oil
- 1 onion, chopped
- 2 cloves garlic, minced
- 1 tbsp grated ginger or ginger paste
- 1 tsp turmeric
- 2 tbsp curry powder
- 1 tbsp flour
- 250ml/1 cup chicken stock
- 125ml/1/2 cup coconut milk
- 1 tsp soy sauce
- 2 tsp white sugar
For the Chicken Katsu:
- 4 skinless, boneless chicken breasts
- 100g/3/4 cup plain flour
- 3 tsp salt
- 1 ½ tsp black pepper
- 2 eggs, beaten
- 150g/1 ⅓ cup Panko breadcrumbs
- Oil spray (for the air fryer)
Optional Substitutions:
- Use gluten-free breadcrumbs for a gluten-free version.
- Substitute almond flour for plain flour to keep this low-carb.
How to Make Chicken Katsu Curry – Step by Step
Step 1: Prepare the Curry Sauce
To start, heat vegetable oil in a frying pan over medium heat. Add the chopped onion and sauté for about 7 minutes until softened. Then, stir in the minced garlic and grated ginger, cooking for another minute. This will bring out the fragrant flavors in your curry sauce.
Step 2: Add the Spices
Next, add turmeric, curry powder, and flour to the pan. Stir and cook for about 1 minute until the mixture becomes a thick paste. Gradually pour in the chicken stock, stirring continuously to avoid lumps. Add the coconut milk and soy sauce, and allow the sauce to simmer until it thickens, which should take about 10 minutes. Add sugar to taste and set aside to cool.
Tip: For a smoother texture, you can blend the sauce before serving, or if you prefer a chunkier sauce, leave it as is.
Step 3: Prepare the Chicken Katsu
While the curry sauce is cooling, prepare your chicken katsu. Slice each chicken breast in half lengthwise to make thin cutlets. Set up three bowls: one with flour mixed with salt and pepper, one with beaten eggs, and one with Panko breadcrumbs.
Step 4: Coat the Chicken
Dredge each chicken cutlet first in the flour, then dip it into the egg, and finally coat it with Panko breadcrumbs. Place each coated cutlet on a cutting board and repeat for all the chicken pieces.
Step 5: Cook in the Air Fryer
Preheat your air fryer to 180°C (350°F). Spray each chicken cutlet with oil on both sides, and place them in a single layer in the air fryer basket. Air fry for 8 minutes on one side, then flip and fry for another 7 minutes. You may need to cook the chicken in batches, depending on the size of your air fryer.
Helpful Tips for Chicken Katsu Curry
- For extra-crispy chicken katsu, double-coat the cutlets by repeating the egg and breadcrumb steps.
- You can freeze uncooked, breaded chicken cutlets for up to 3 months. Simply thaw and air fry when ready to cook.
- To avoid soggy breading, don’t cover the fried chicken with foil. Keep it warm in a low oven until serving.
Cooking Tips for the Best Chicken Katsu
- Use fresh ingredients for the best flavor, especially when making the curry sauce.
- Air-frying the chicken ensures a crispy exterior with minimal oil, making this a healthier option compared to deep-frying.
- If you prefer a mild curry, reduce the amount of curry powder or add extra coconut milk to mellow the spice level.
Serving Suggestions for Chicken Katsu Curry
Serve your Chicken Katsu Curry with a generous portion of steamed rice for a classic presentation. You can also pair it with a side of pickled vegetables or a light Japanese cucumber salad to balance out the richness of the dish.
For a complete meal, try these crispy appetizers for the perfect start to your meal.
Nutritional Information
Each serving of Chicken Katsu Curry contains approximately:
- Calories: 586 kcal
- Fat: 30g
- Carbohydrates: 40g
- Protein: 35g
- Fiber: 4g
- Sugar: 6g
Storage and Leftovers for Chicken Katsu Curry
If you have leftovers, store the cooked chicken katsu separately from the curry sauce. Place the chicken in an airtight container and refrigerate for up to 3 days. The curry sauce can also be refrigerated for 3-4 days.
To reheat, place the chicken in the air fryer for 5 minutes at 180°C (350°F) to maintain its crispiness. Warm the curry sauce in a saucepan over low heat, stirring occasionally.
Frequently Asked Questions (FAQs) for Chicken Katsu Curry
1. Can I make this dish gluten-free?
Yes, substitute gluten-free breadcrumbs and gluten-free flour for the coating.
2. Can I use a deep fryer instead of an air fryer?
Absolutely! If using a deep fryer, heat oil to 350°F (175°C) and fry the chicken for 3-4 minutes on each side.
3. How do I make the curry sauce spicier?
Increase the amount of curry powder or add chili flakes to your sauce for extra heat.
4. What side dishes go well with Chicken Katsu Curry?
Traditional accompaniments include steamed rice, pickled vegetables, and a green salad with a light soy-ginger dressing.
Related Recipes for Chicken Katsu Lovers
Looking for more delicious chicken recipes? Check out these options:
Conclusion
We hope you enjoy making and savoring this Chicken Katsu Curry recipe! It’s a simple yet flavorful dish that’s sure to become a favorite in your household. Don’t forget to let us know how yours turned out in the comments below, and feel free to share any personal twists you added to the recipe. Happy cooking!
Print
Chicken Katsu Curry Recipe – Crispy, Delicious, Easy to Make
Description
Hello, food enthusiasts! If you’re a fan of Japanese cuisine or simply crave a dish that’s both crispy and savory, you’re in for a treat today with our Chicken Katsu Curry recipe. This dish is a perfect blend of textures and flavors, with crunchy chicken katsu smothered in a creamy curry sauce. Whether you’ve tried it at your favorite Japanese restaurant or are experiencing it for the first time, this recipe will bring the authentic taste of Chicken Katsu Curry straight to your home!
Ingredients
For the Curry Sauce:
- 2 tbsp vegetable oil
- 1 onion, chopped
- 2 cloves garlic, minced
- 1 tbsp grated ginger or ginger paste
- 1 tsp turmeric
- 2 tbsp curry powder
- 1 tbsp flour
- 250ml/1 cup chicken stock
- 125ml/1/2 cup coconut milk
- 1 tsp soy sauce
- 2 tsp white sugar
For the Chicken Katsu:
- 4 skinless, boneless chicken breasts
- 100g/3/4 cup plain flour
- 3 tsp salt
- 1 ½ tsp black pepper
- 2 eggs, beaten
- 150g/1 ⅓ cup Panko breadcrumbs
- Oil spray (for the air fryer)
Optional Substitutions:
- Use gluten-free breadcrumbs for a gluten-free version.
- Substitute almond flour for plain flour to keep this low-carb.
Instructions
Step 1: Prepare the Curry Sauce
To start, heat vegetable oil in a frying pan over medium heat. Add the chopped onion and sauté for about 7 minutes until softened. Then, stir in the minced garlic and grated ginger, cooking for another minute. This will bring out the fragrant flavors in your curry sauce.
Step 2: Add the Spices
Next, add turmeric, curry powder, and flour to the pan. Stir and cook for about 1 minute until the mixture becomes a thick paste. Gradually pour in the chicken stock, stirring continuously to avoid lumps. Add the coconut milk and soy sauce, and allow the sauce to simmer until it thickens, which should take about 10 minutes. Add sugar to taste and set aside to cool.
Tip: For a smoother texture, you can blend the sauce before serving, or if you prefer a chunkier sauce, leave it as is.
Step 3: Prepare the Chicken Katsu
While the curry sauce is cooling, prepare your chicken katsu. Slice each chicken breast in half lengthwise to make thin cutlets. Set up three bowls: one with flour mixed with salt and pepper, one with beaten eggs, and one with Panko breadcrumbs.
Step 4: Coat the Chicken
Dredge each chicken cutlet first in the flour, then dip it into the egg, and finally coat it with Panko breadcrumbs. Place each coated cutlet on a cutting board and repeat for all the chicken pieces.
Step 5: Cook in the Air Fryer
Preheat your air fryer to 180°C (350°F). Spray each chicken cutlet with oil on both sides, and place them in a single layer in the air fryer basket. Air fry for 8 minutes on one side, then flip and fry for another 7 minutes. You may need to cook the chicken in batches, depending on the size of your air fryer.
Equipment

2Pcs Heart Shape Cake Pans, Aluminum Heart Cake Mold, Reusable 10 inch
Buy Now →
Kids Chill Leak-Proof Lunch Box – Included Reusable Ice Pack Keeps Food Cold
Buy Now →Notes
- For extra-crispy chicken katsu, double-coat the cutlets by repeating the egg and breadcrumb steps.
- You can freeze uncooked, breaded chicken cutlets for up to 3 months. Simply thaw and air fry when ready to cook.
- To avoid soggy breading, don’t cover the fried chicken with foil. Keep it warm in a low oven until serving.
