Description
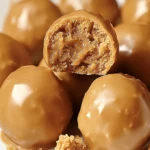
Welcome, sweet-tooth enthusiasts! If you’re a fan of peanut butter, chocolate, and the classic crunch of Butterfinger, these No-Bake Butterfinger Balls will be your new favorite treat! These delicious bites are perfect for anyone craving a quick, no-bake dessert that’s as fun to make as it is to eat. So, if you’re looking for a delightful way to satisfy your candy cravings, you’re in the right place—let’s dive into this tasty recipe!
Ingredients
- 1 cup creamy peanut butter – Smooth and creamy, it adds a rich, nutty base for the Butterfinger balls.
- 2 cups powdered sugar – This gives the mixture structure and sweetness, making the balls hold their shape.
- 1 teaspoon vanilla extract – Enhances the flavor with a subtle depth.
- 2 cups crushed Butterfinger candy bars – Adds that classic Butterfinger crunch and flavor.
- 12 oz milk chocolate, melted – For coating the Butterfinger balls with a rich chocolate shell.
Optional Substitutions:
- Swap almond butter or sunflower seed butter for a nut-free or peanut-free version.
- Use dark chocolate instead of milk chocolate for a more intense chocolate flavor.
Instructions
Step 1: Prepare the Peanut Butter Mixture
In a large mixing bowl, combine the creamy peanut butter, powdered sugar, and vanilla extract. Mix well until all ingredients are fully combined and the mixture is smooth.
Step 2: Add the Butterfinger Crunch
Add the crushed Butterfinger candy bars to the peanut butter mixture, stirring until the candy pieces are evenly distributed. This step ensures every bite has that irresistible Butterfinger crunch.
Step 3: Shape the Balls
Scoop out small portions of the mixture and roll them into 1-inch balls. Place the balls on a baking sheet lined with parchment paper to prevent sticking.
Step 4: Freeze the Balls
Place the baking sheet in the freezer for about 30 minutes. This helps the balls firm up, making it easier to dip them in chocolate later.
Step 5: Dip in Chocolate
Melt the milk chocolate in a microwave-safe bowl, stirring every 20 seconds until smooth. Take the balls out of the freezer and dip each one in the melted chocolate, using a fork to coat them thoroughly. Let any excess chocolate drip off before placing them back on the parchment paper.
Step 6: Set the Chocolate
Allow the chocolate coating to set by placing the Butterfinger balls in the refrigerator for 15 minutes or until the chocolate is firm.
Equipment

2Pcs Heart Shape Cake Pans, Aluminum Heart Cake Mold, Reusable 10 inch
Buy Now →
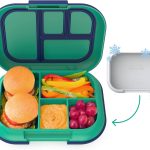
Kids Chill Leak-Proof Lunch Box – Included Reusable Ice Pack Keeps Food Cold
Buy Now →Notes
- Use Cold Peanut Butter: This helps the mixture firm up faster, making it easier to shape into balls.
- Crush Butterfinger Bars Finely: Finer pieces of candy bars distribute more evenly, giving each bite the perfect amount of Butterfinger crunch.
- Experiment with Chocolate: If you’re a dark chocolate fan, try substituting dark chocolate for the milk chocolate.
